
How To Get Your Front Splits in 30 Days: A Yoga Guide
How To Get Your Front Splits in 30 Days: A Yoga Guide
By Madison Enos
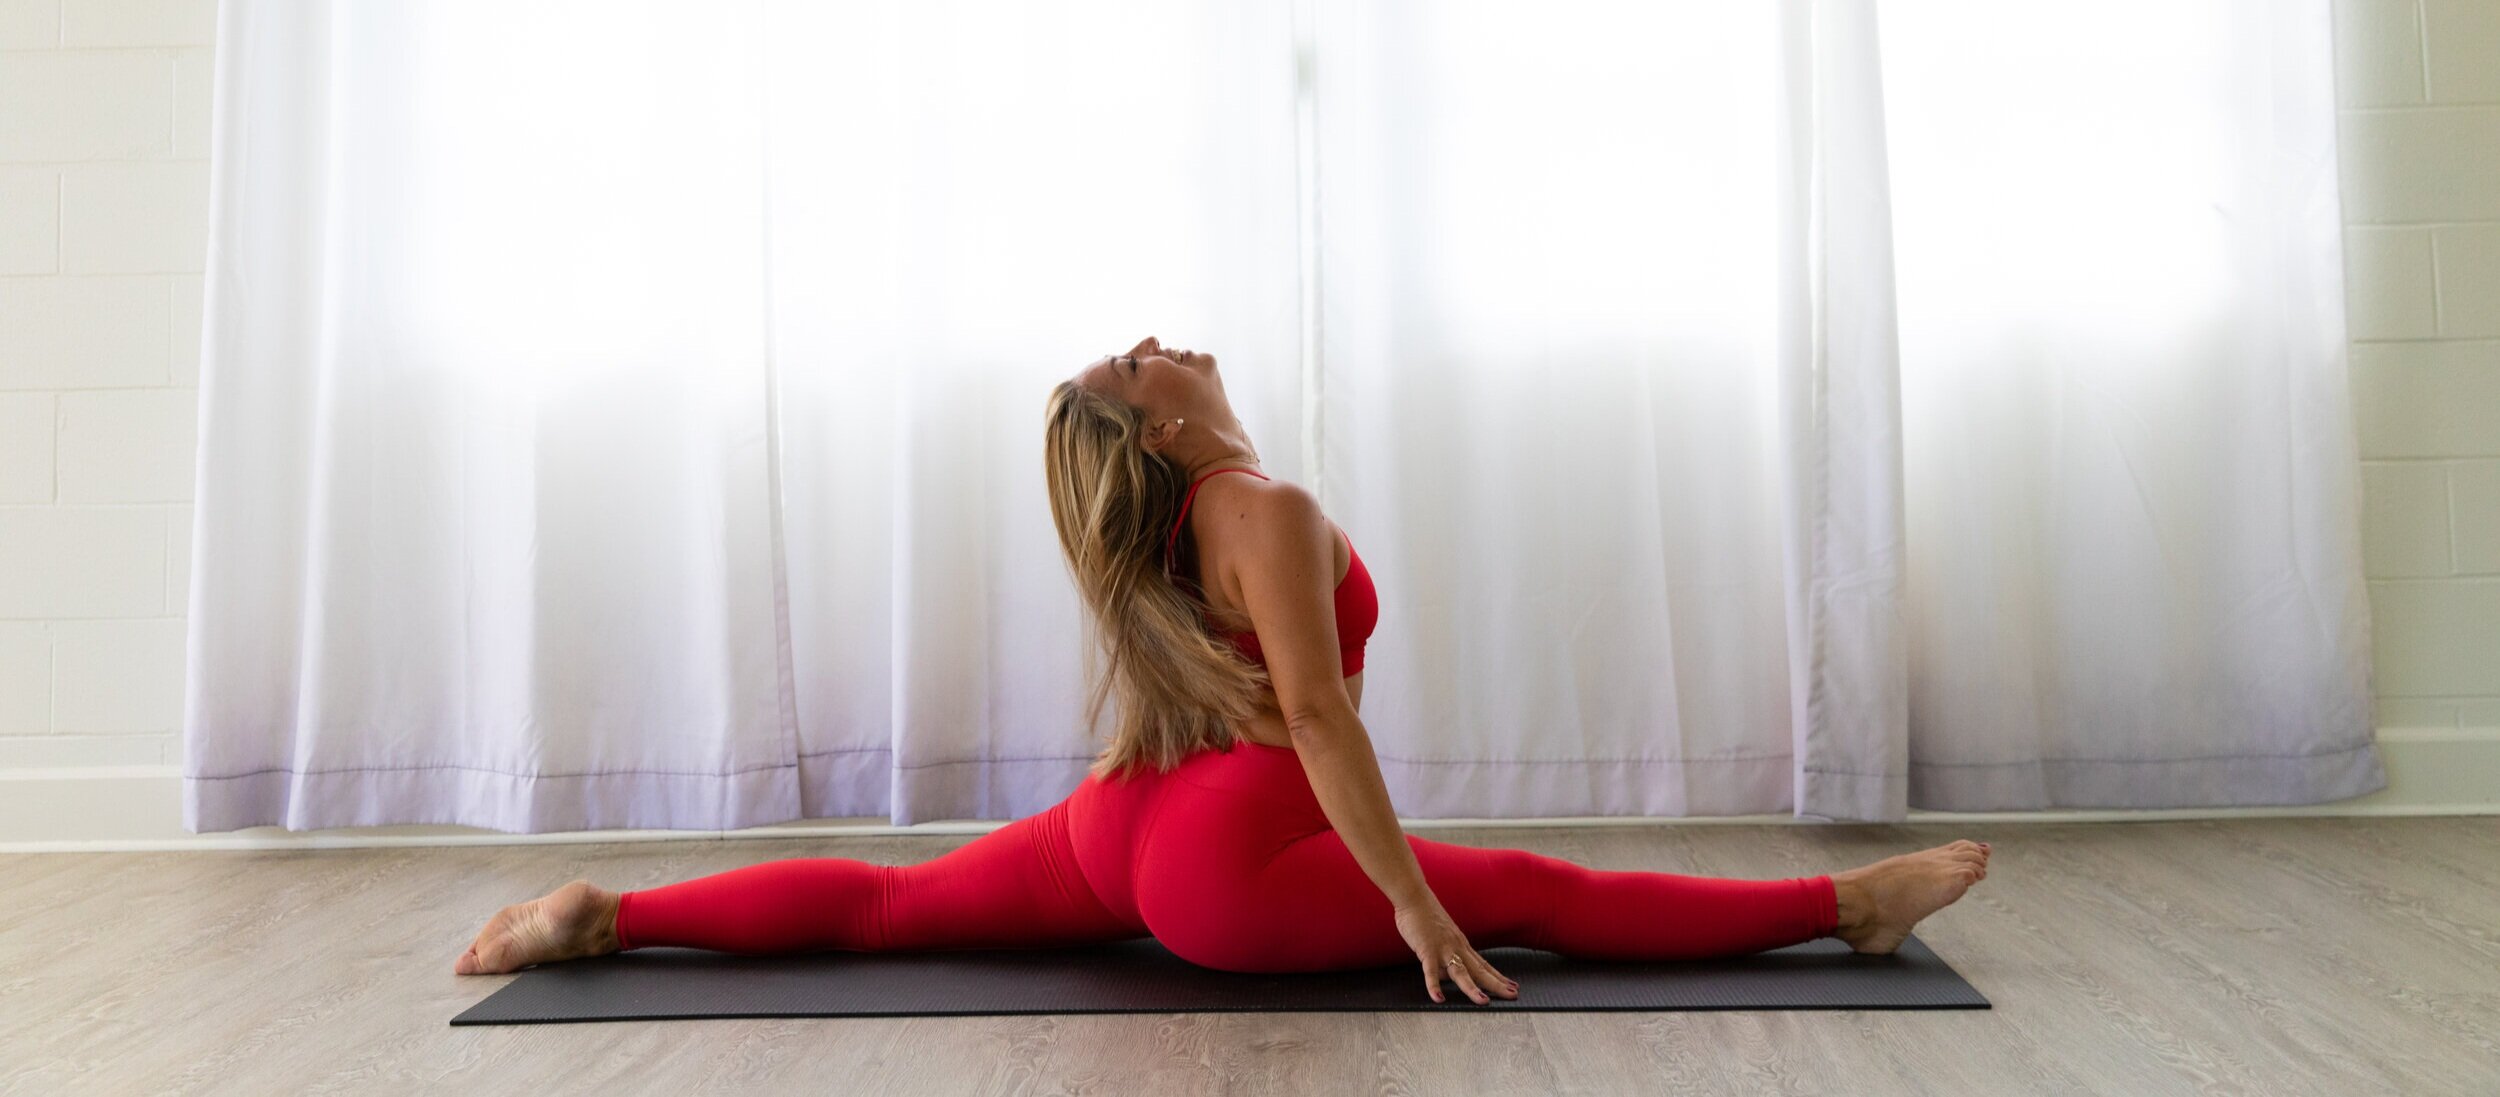
Full Splits (Hanumanasana) is known for being hard, even for yogis.
But in the spring of 2017, a yoga instructor in Japan named Eiko published a book called, “Even the Stiffest People Can Do the Splits.” The book included a four-week stretching routine that claimed to help people achieve full-splits in only 30 days - and it made her famous.
The splits are a fitness and flexibility milestone. Building the mobility and flexibility to do them well takes time and consistency, so today we are sharing our 30 Days To Front Splits Guide.
In just 15-minutes a day, you can improve your flexibility, increase your range of motion, and finally touch the ground in your full front splits. Let’s get started.
In this post we’ll cover:
How Fast You Can Expect To Get Into Splits
11 Stretching Tips To Help You Master Flexibility
How To Know When You’re Overstretching
5 Common Misalignments in Front Splits
15 Yoga Poses that Prepare You For Full Splits
How To Safely Move Into Splits
How Fast Can I Get Into Splits?
It’s the question everyone always asks, and the answer is simple: it depends.
This challenge is 30 days, but everyone’s starting point is different. There are so many factors that impact our natural flexibility: age, gender, joint structure, muscle bulk, and prior injuries all have an effect.
But with consistent stretching and the right mentality, it is possible to master front splits in one month! Others may need 3 to 12 months of consistent stretching to reach the floor, but the ultimate goal should be to increase your overall mobility and to feel better in your body. With time, consistency, and the right mindset, it will come.
11 Tips To Master The Splits
1. Warm Up First
If your body is cold, your muscles are not ready to stretch. Think of your muscles like a rubber band. A cold rubber band is brittle and more likely to snap, whereas a warm rubber band is soft and pliable. Before you stretch, take a brisk walk or do some cardio to get your core body temperature up!
Pro tip: If you live in a cold place, wear warm clothing while you do light exercise to trap the heat inside.
2. Start Gentle
Always start slowly. One of the biggest mistakes students make is overstretching. Moving too quickly can result in injury, which sets your flexibility back in the long run. Instead, move into the pose mindfully, and when you start to feel the stretch, pause and breathe. Wait three to five rounds of breath before moving deeper into the pose.
3. Don’t Go Too Deep
If you try to move all the way to the very edge of your range, you will most likely injure yourself or experience muscle soreness. Aim to stretch to 70% of your full range of motion.
4. Notice Your Breath
We all have a tendency to hold our breath when something is challenging. Stretching is no different! Try to keep your breaths long, slow, and deep to encourage your body to relax and settle into the posture.
5. Use A Timer
A timer is so important when you’re working to improve your flexibility. Make sure that you hold each pose for the same amount of time on each side. We recommend starting with 30 seconds and slowly working up to one minute.
6. Use Props
Props are a great way to bring the ground closer to you. In the poses below, we offer modifications for each pose using props to help you find stability and ease. If you don’t have any yoga blocks, get creative! Couch cushions, pillows, and folded blankets can also do the trick.
7. Follow A Routine
Practicing yoga every day will not automatically help you get into full splits. In order to work into a challenging posture like Full Splits, also known as Monkey Pose, you need to consistently practice poses that specifically target the hamstrings, quads, hip flexors, adductors, glutes, and groin.
8. Stretch Every Day
You’ve probably heard it a million times, but consistency is key. You will see a huge difference in your flexibility if you stretch for 15 minutes every day instead of 30 minutes three times a week. Try to be consistent with your routine, but even if it’s only a long forward fold before bed, stretch your tightest muscle group every day.
9. Don’t Skimp On Post-Workout Stretches
A flexibility routine needs to be done in addition to stretching after a workout. If you do cardio, weight training, or body weight exercises, stretch for 5-10 minutes after to stay limber and lessen the tightness that comes from building strength.
10. Micro-bend Your Major Joints
Always keep a micro-bend in your knee when you stretch your hamstrings. The micro-bend might be so small that it’s not very visible, but it offers softness and enough give to keep you stable, grounded, and in control. When you lock out your knee, the joint is forced out of alignment. This can damage your knee cartilage, pull your pelvis out of place, and create strain on your lower back.
11. Focus On Full Body Alignment
In order to move into poses with stability, you need to find a balance between strength and softness. As you relax and stretch your lower body for splits, make sure your upper body is strong to support the posture. Think: long spine, active core.
How To Know When You’re Overstretching
You may have heard a yoga instructor tell you to “move towards your edge.” That’s because when you sit in a static stretch like a yoga pose, you want to be moving within your range of motion rather than past the point of normal elasticity. Move towards your edge, but do not try to reach it. Stretching should never be outright painful - if it is, back off or find a way to modify the pose.
You’ll know you’re overstretching if:
You feel any pain or pinching while holding the pose
You feel unstable in the pose
You feel like you have a lack of control
You start to hold your breath, find it difficult to breath, or breathe more quickly
You feel like you’re as deep as you could possibly go
You cannot relax in the pose
Your muscles are sore the next day
5 Common Front Splits Misalignments
1. Uneven Hips
Ensure that you are not resting on the hip/glute of your front leg as a way to get your back leg closer to the ground. This will often happen to people with tight hamstrings or quads. Use blocks to prop yourself up and lower both hips down evenly.
2. Rotated Back Leg
If your pelvis is not level, your beck leg may rotate to rest on the inner thigh, calf, and foot. Ensure that the top of your back foot makes contact with the earth and you are resting on the front of your quadricep. If the stretch is too intense, use a block of two under your front thigh for stability.
3. Flat Front Foot
Some people move into splits from standing, and therefore have a flat front foot on the ground. This does not allow your calf/hamstring to lengthen to its fullest capacity. Instead, move in from a Crescent moon position on the ground, list your front toes up, and slide your heel forward.
4. Curved Spine
Safely moving into splits requires proper form. Make sure you sit up tall with a long spine and engage your core. This will help you maintain control as you move into the pose.
5. Shrugged Shoulders
If your hands are on blocks, invite a gentle bend into your elbows to keep your shoulders relaxed down your back.
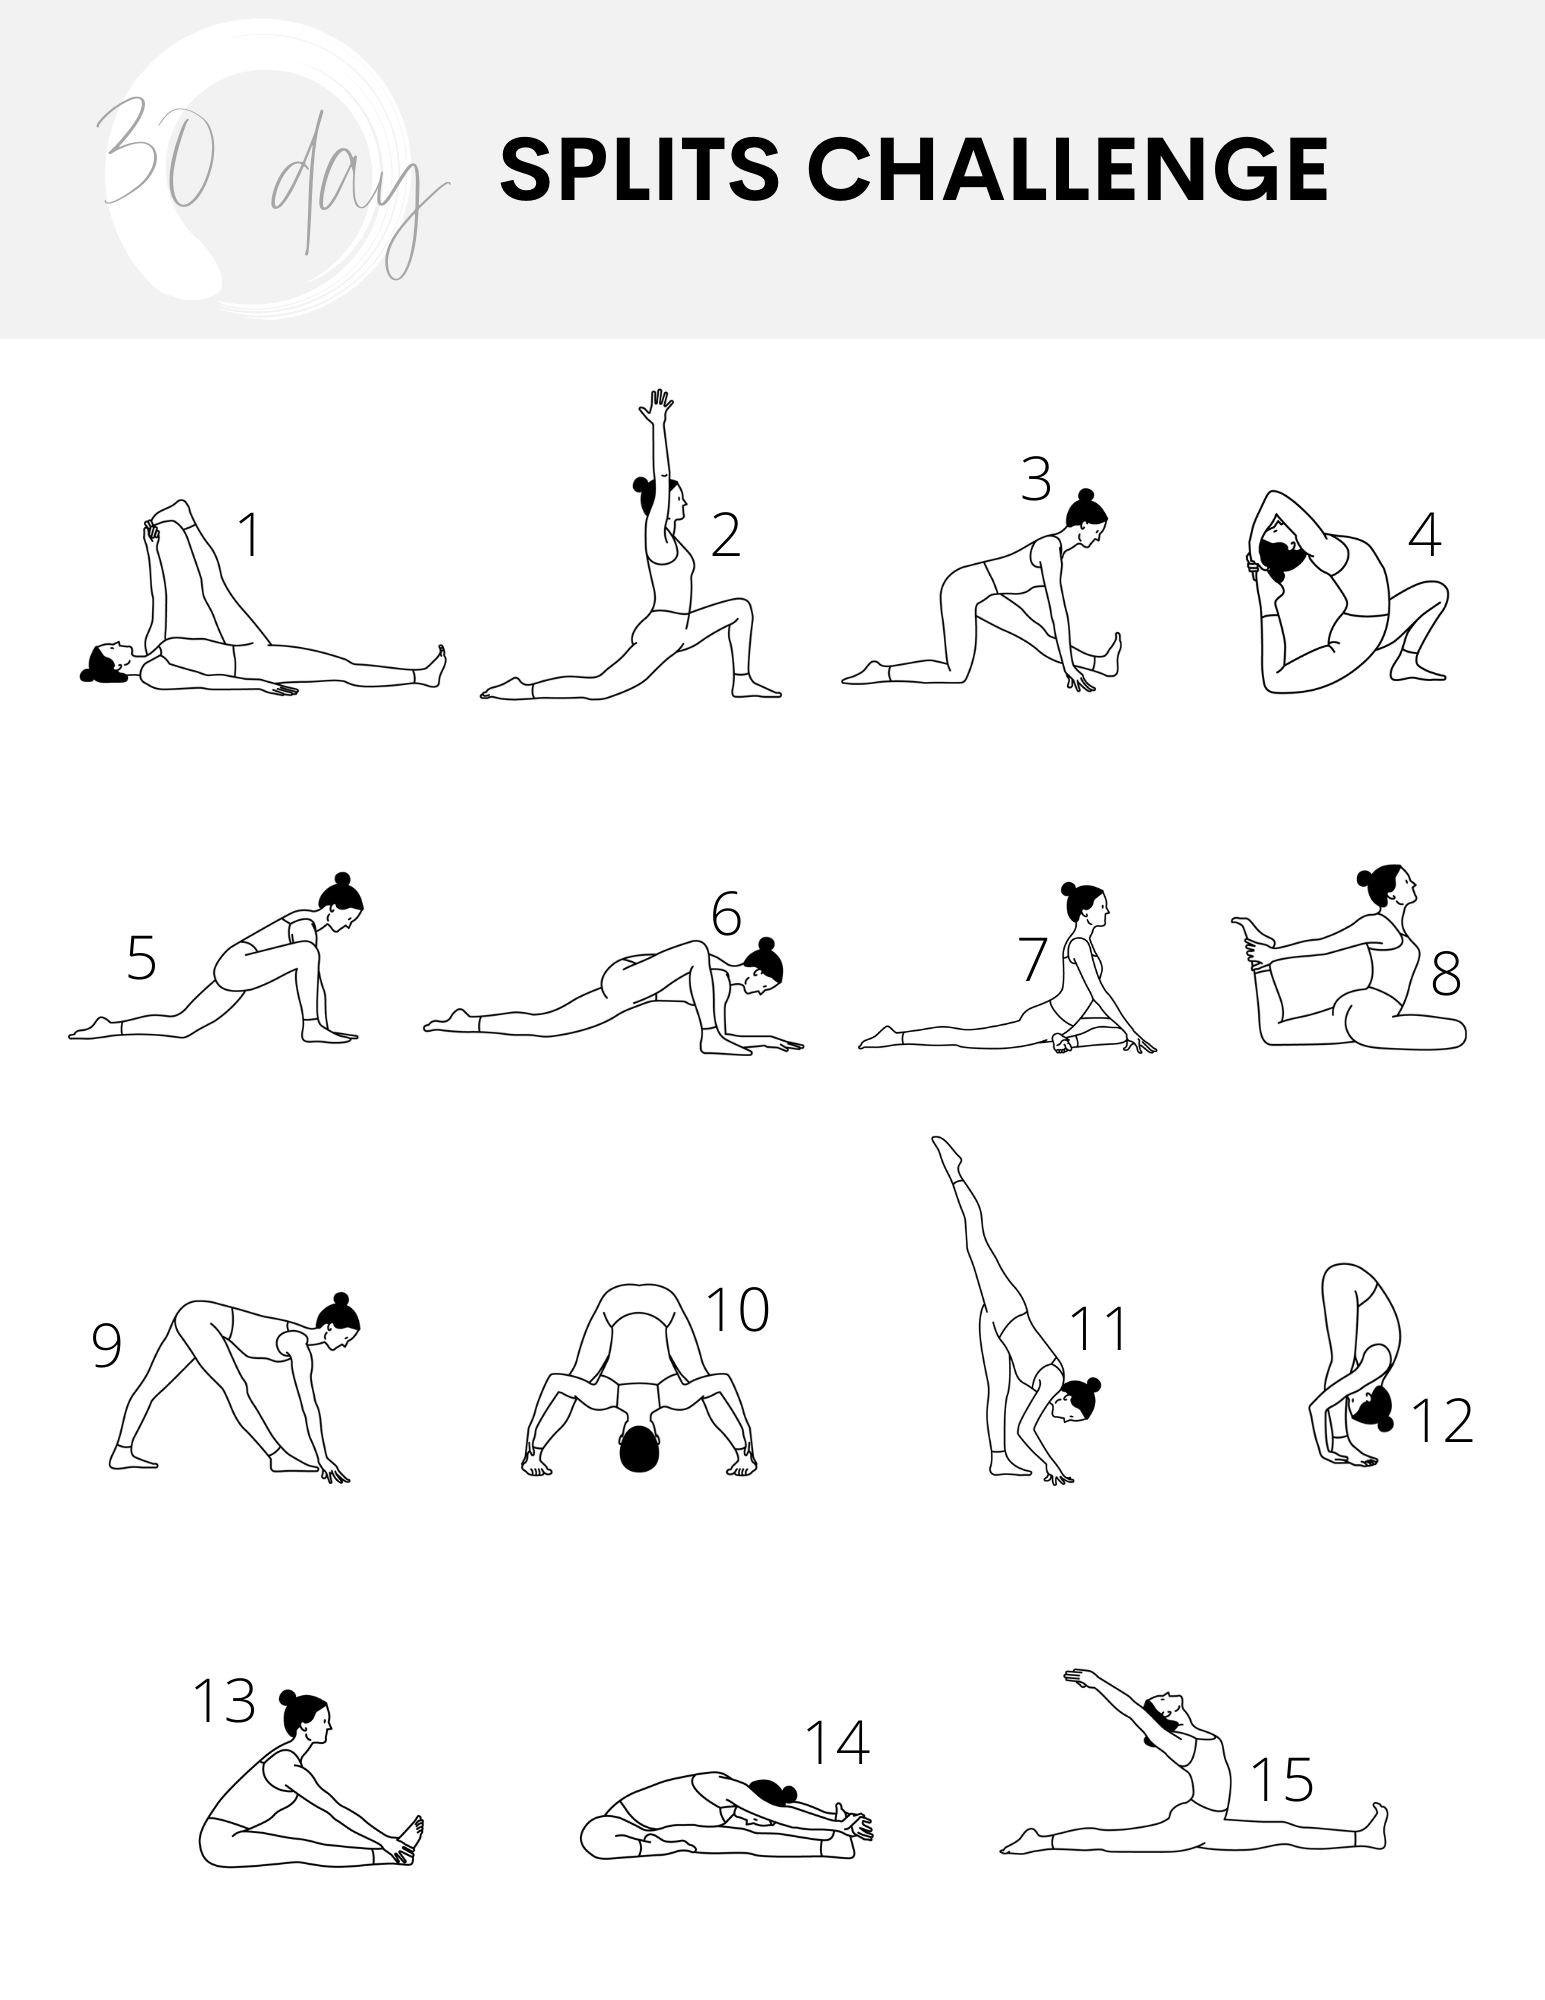
15 Best Yoga Poses To Prep For Full Splits
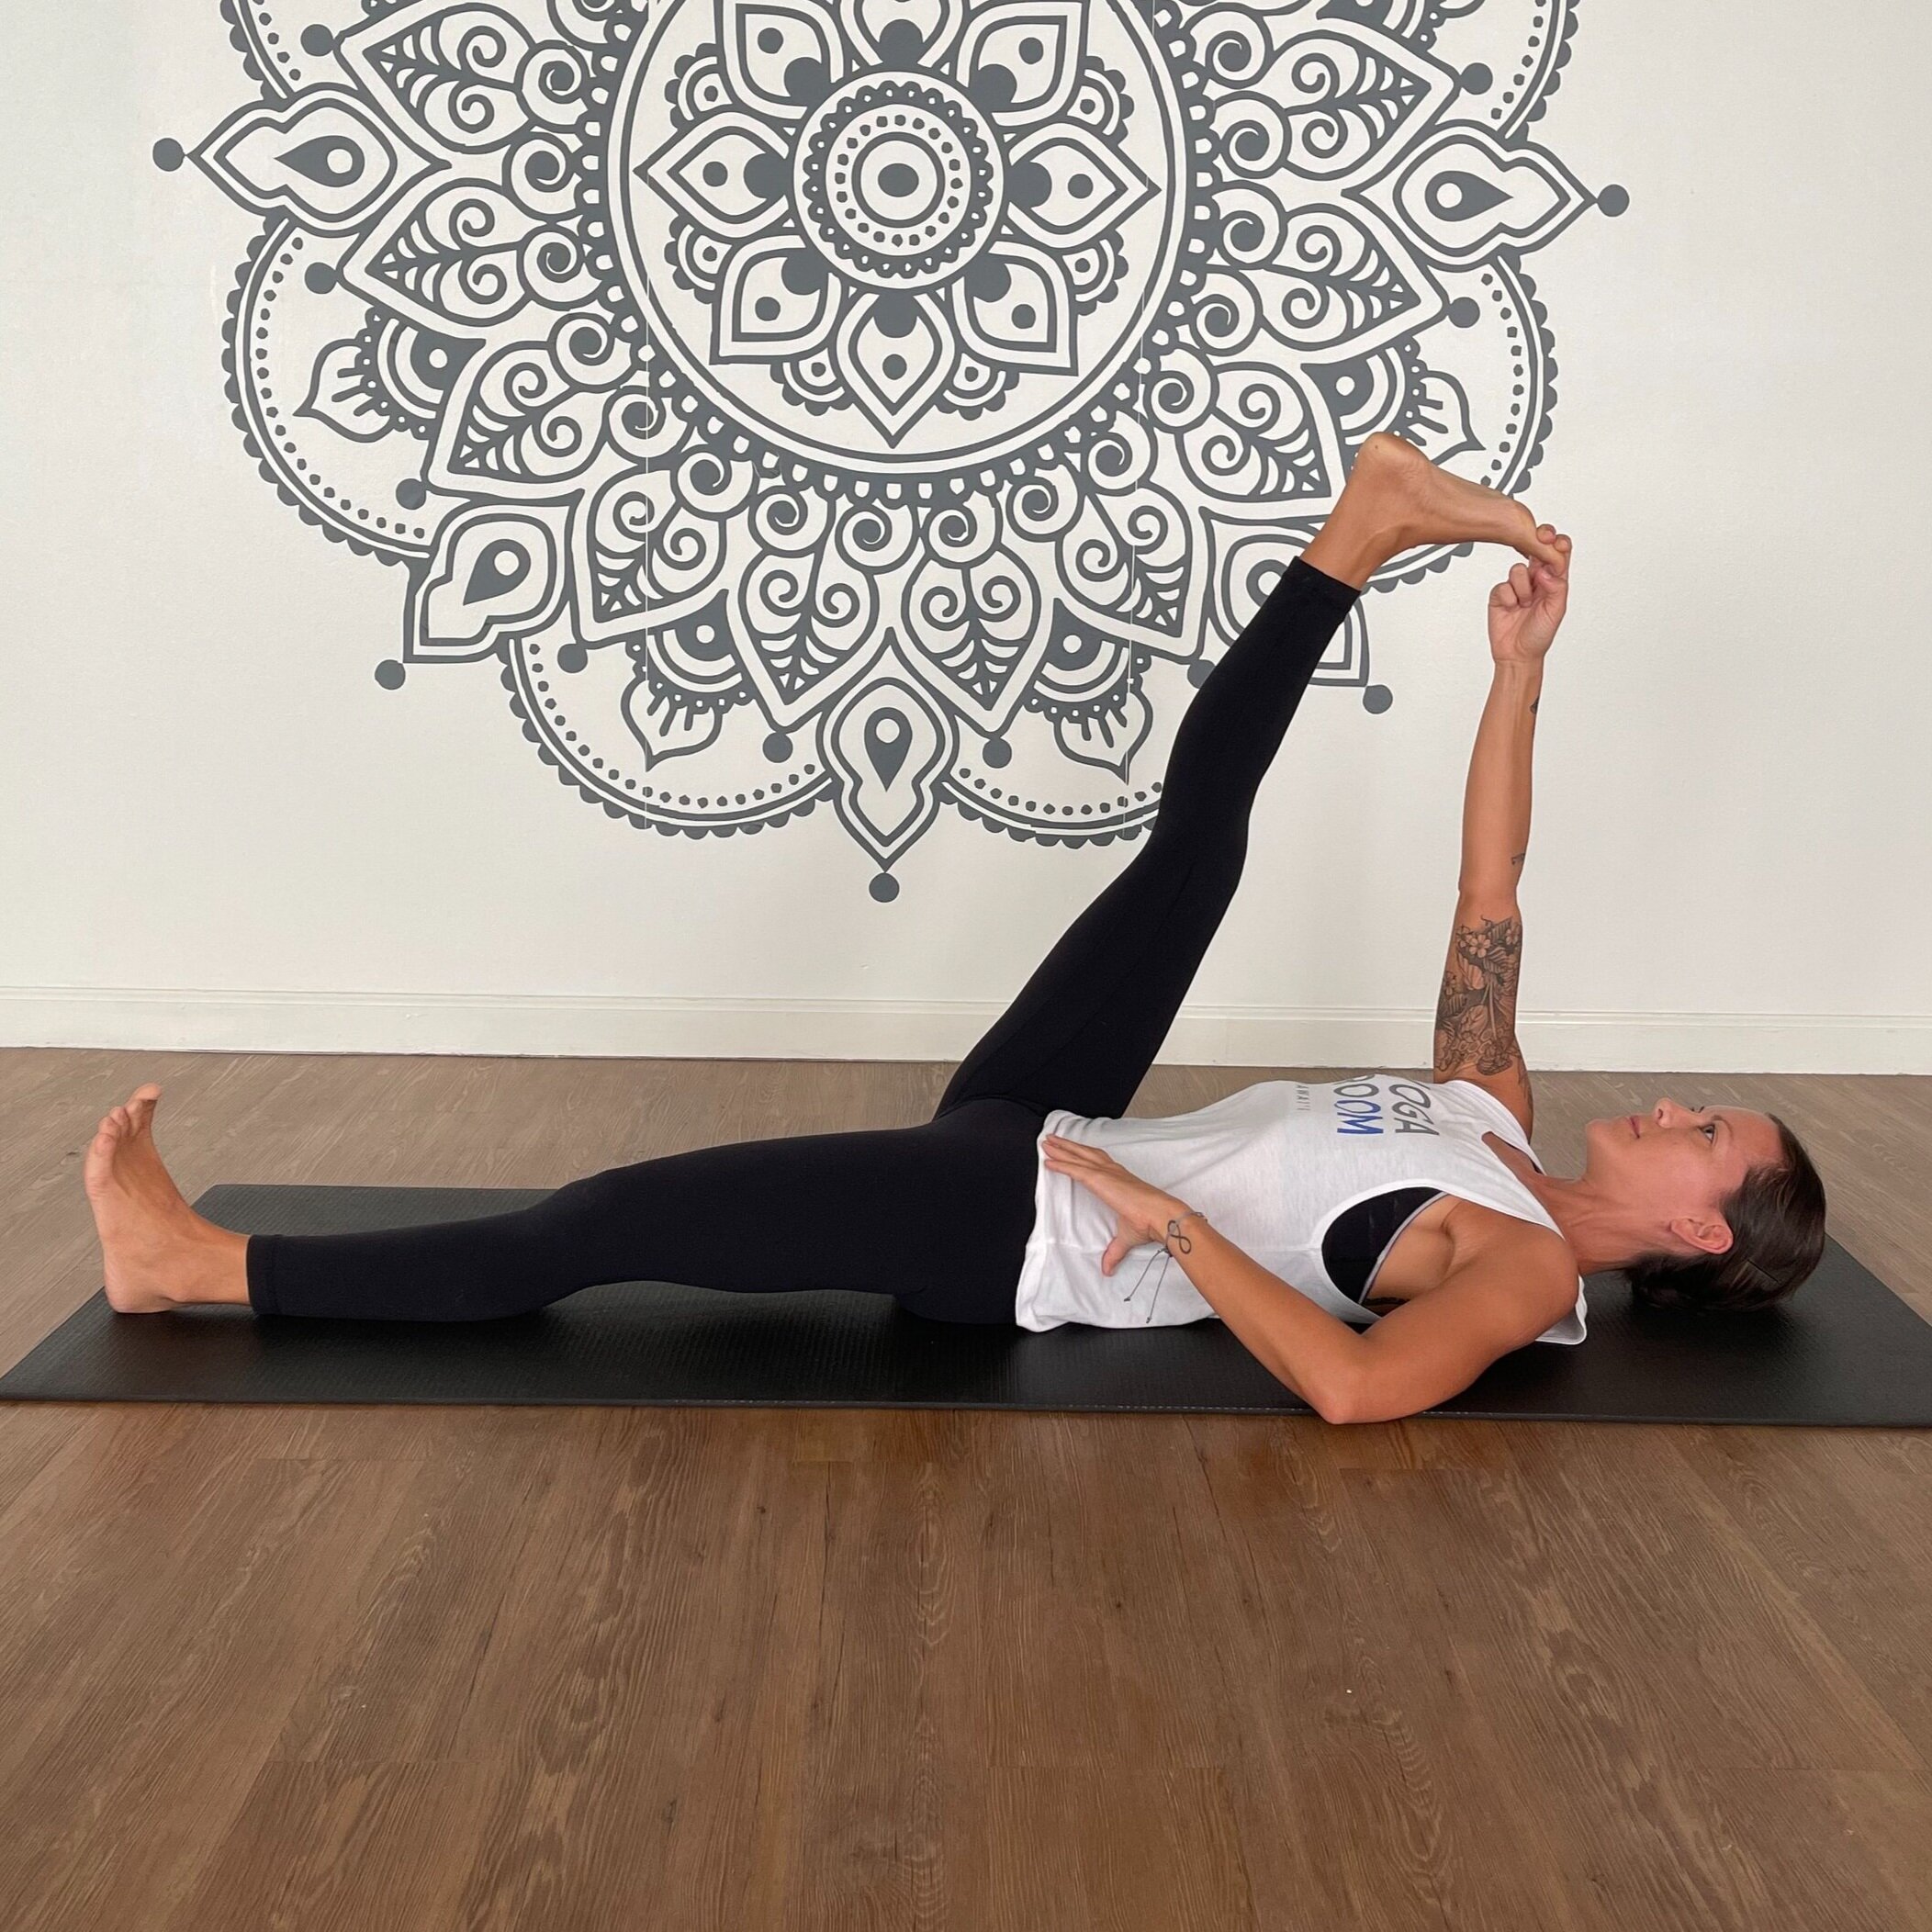
1. Reclined Hand To Big Toe Pose (Supta Padangusthasana)
Target Muscles
Hamstrings and calves
Alignment Tips
Lay down on your back and hug one knee into your chest. Reach your fingers for your toe and extend your leg skyward. Flex your toes towards your shin and as you pull your toe closer to your face.
Modifications
Reach for the back of your thigh instead of your toe
Use a strap around your foot
Bend your extended leg to plant your foot on the ground

2. Crescent Moon (Anjaneyasana)
Target Muscles
Hip flexors, psoas, and quadriceps
Alignment Tips
Stand on your knees. Step one foot forward so that your front knee stacks over your heel. Shift your hips forward and energetically pull your hip bones up towards your bottom ribs to feel more of a stretch through your hip flexors and back quadricep. Reach your arms overhead.
Modifications
Keep your hands on your front thigh
2. Put a pillow or blanket under your back knee
3. Half Splits (Ardha Hanumanasana)
Target Muscles
Hamstrings
Alignment Tips
Stand on your knees and step one foot forward. Bring your fingers to the ground on either side of your front leg, then pull your hips back to fully straighten your front leg. Flex your toes back towards your shin, but keep a micro-bend in your knee. Pull your chest forward, leading with your heart.
Modifications:
Use blocks under your hands to keep your spine long
Place a blanket or pillow under your back knee for cushioning
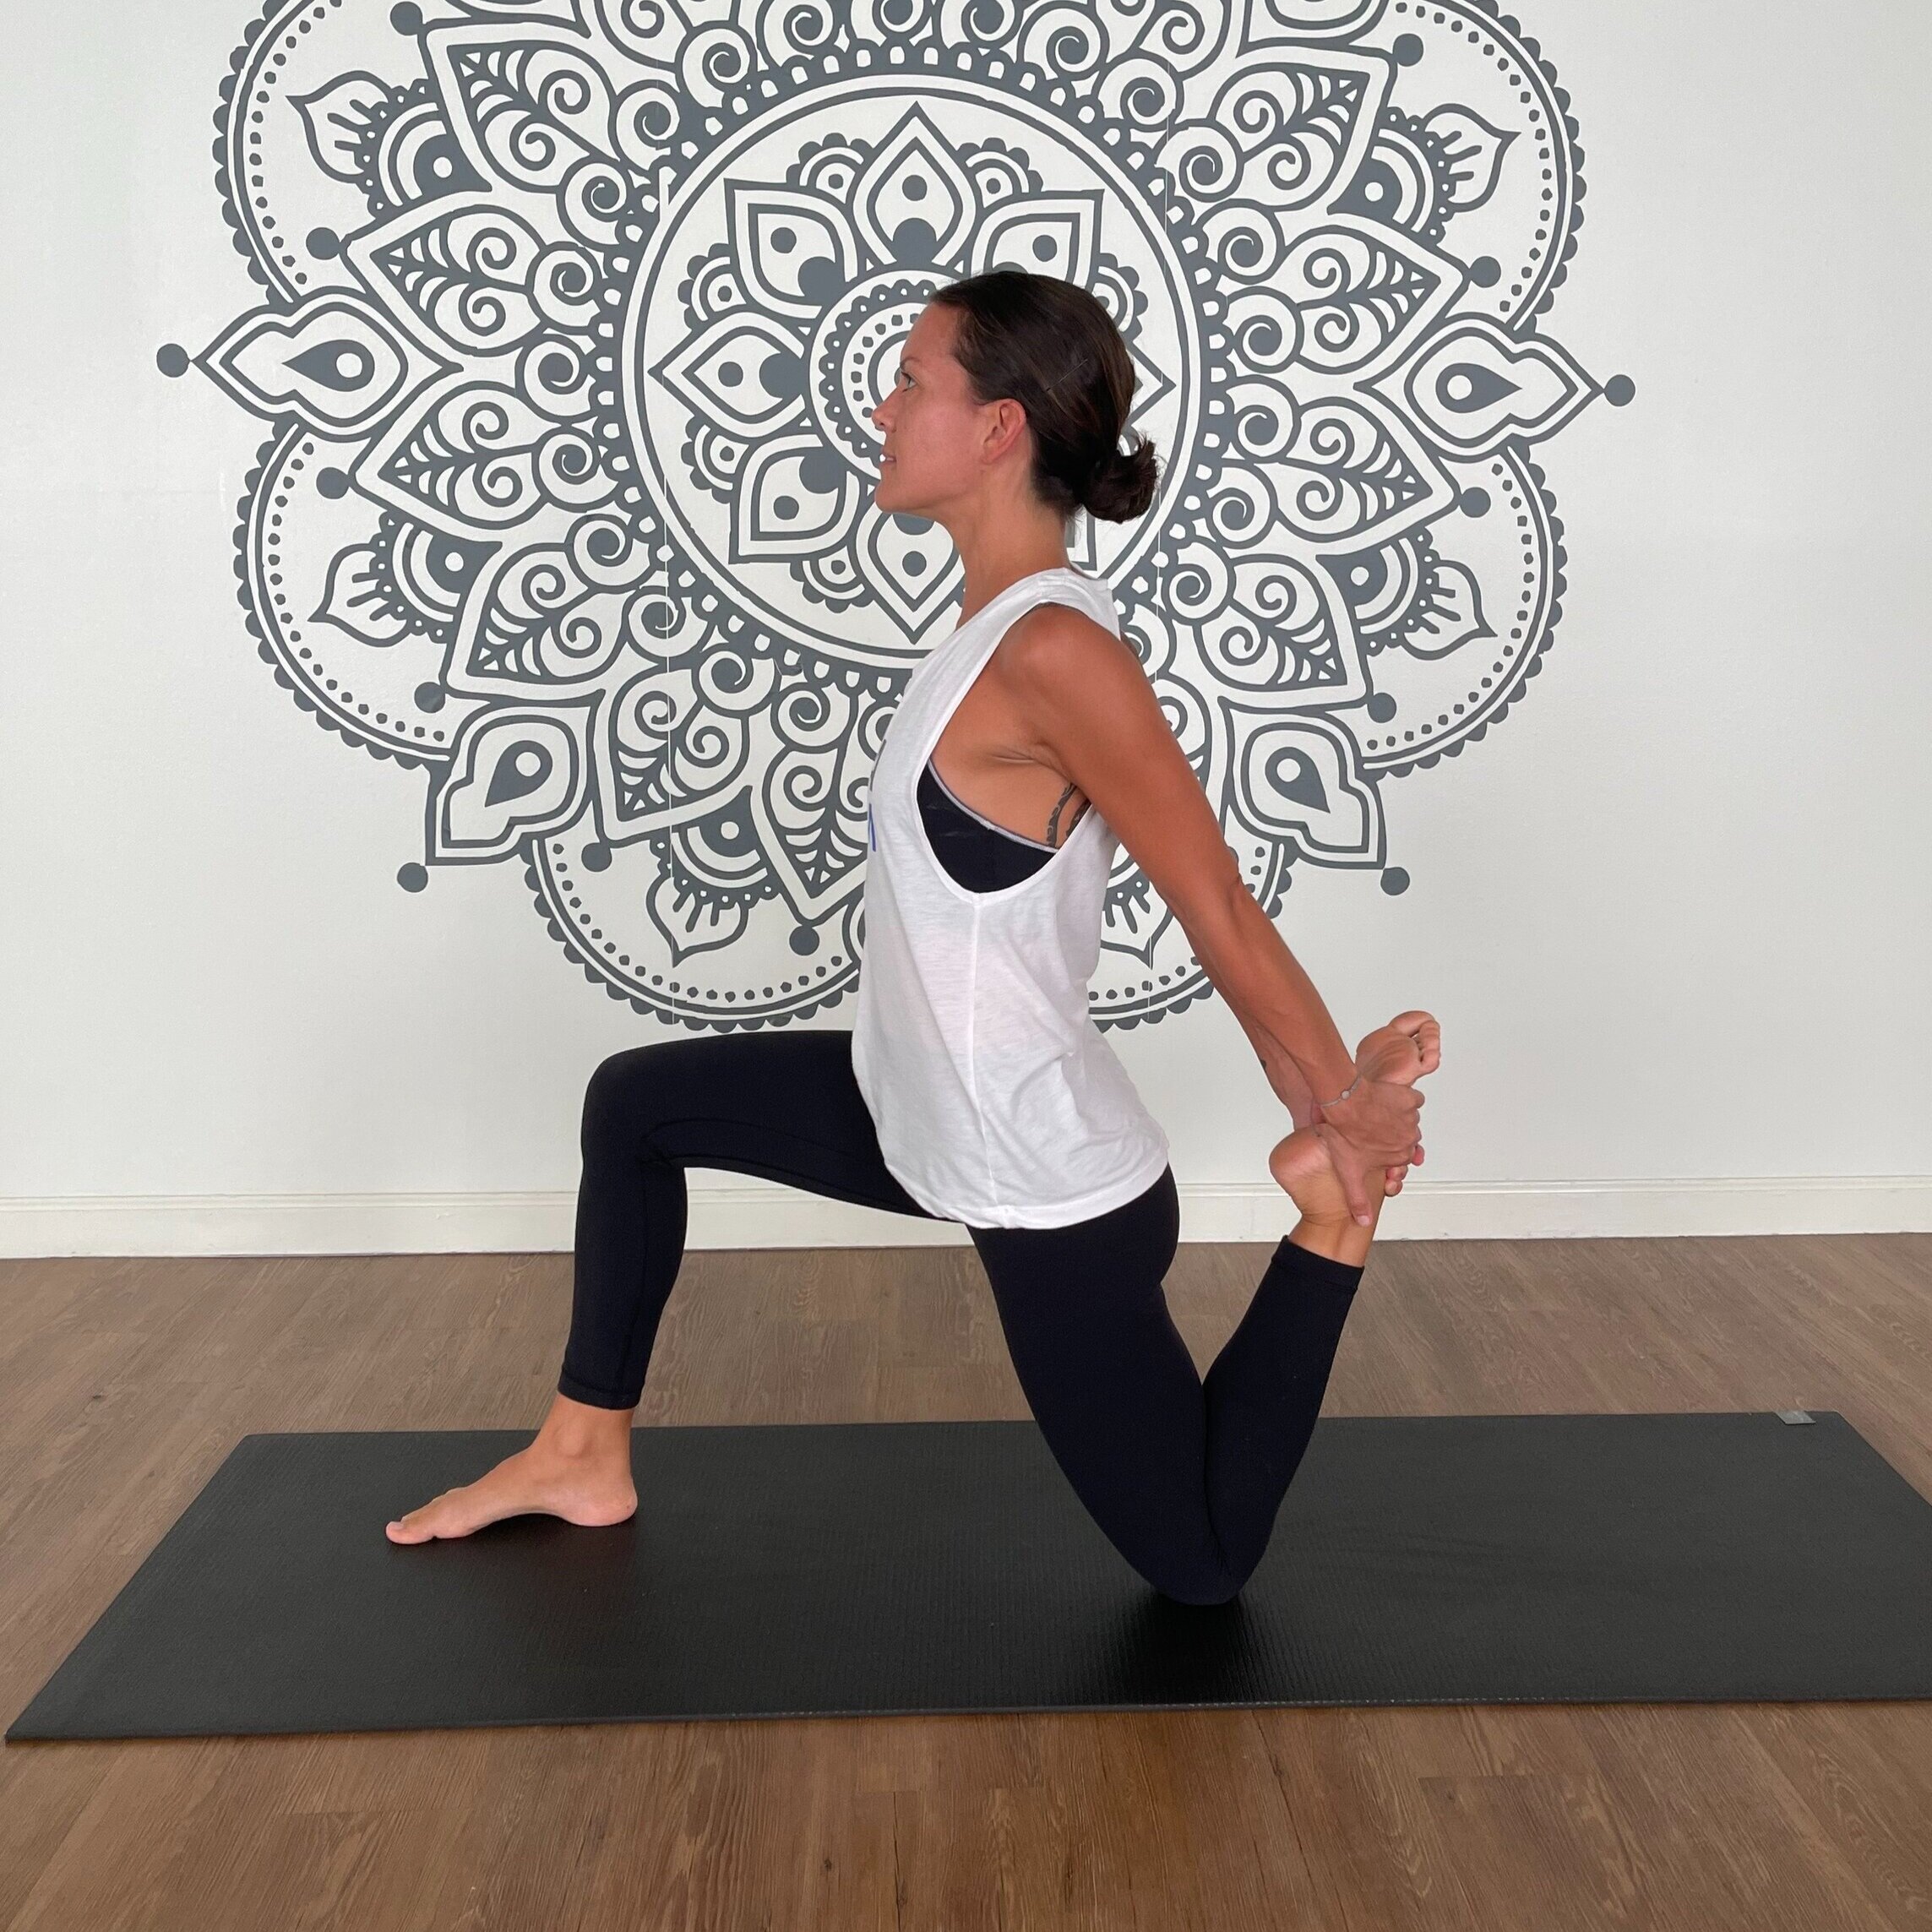
4. King Arthur Pose
Target Muscles:
Quadriceps, psoas, and hip flexors
Alignment Tips
Stand on your knees and step one foot forward. Bend your back knee and reach your hands behind you to grasp your back foot, keeping your spine upright. Pull your heel towards your glute.
Modifications:
Place a pillow or blanket under your back knee
Use a strap to capture your back foot
Rest the top of your back foot against a wall

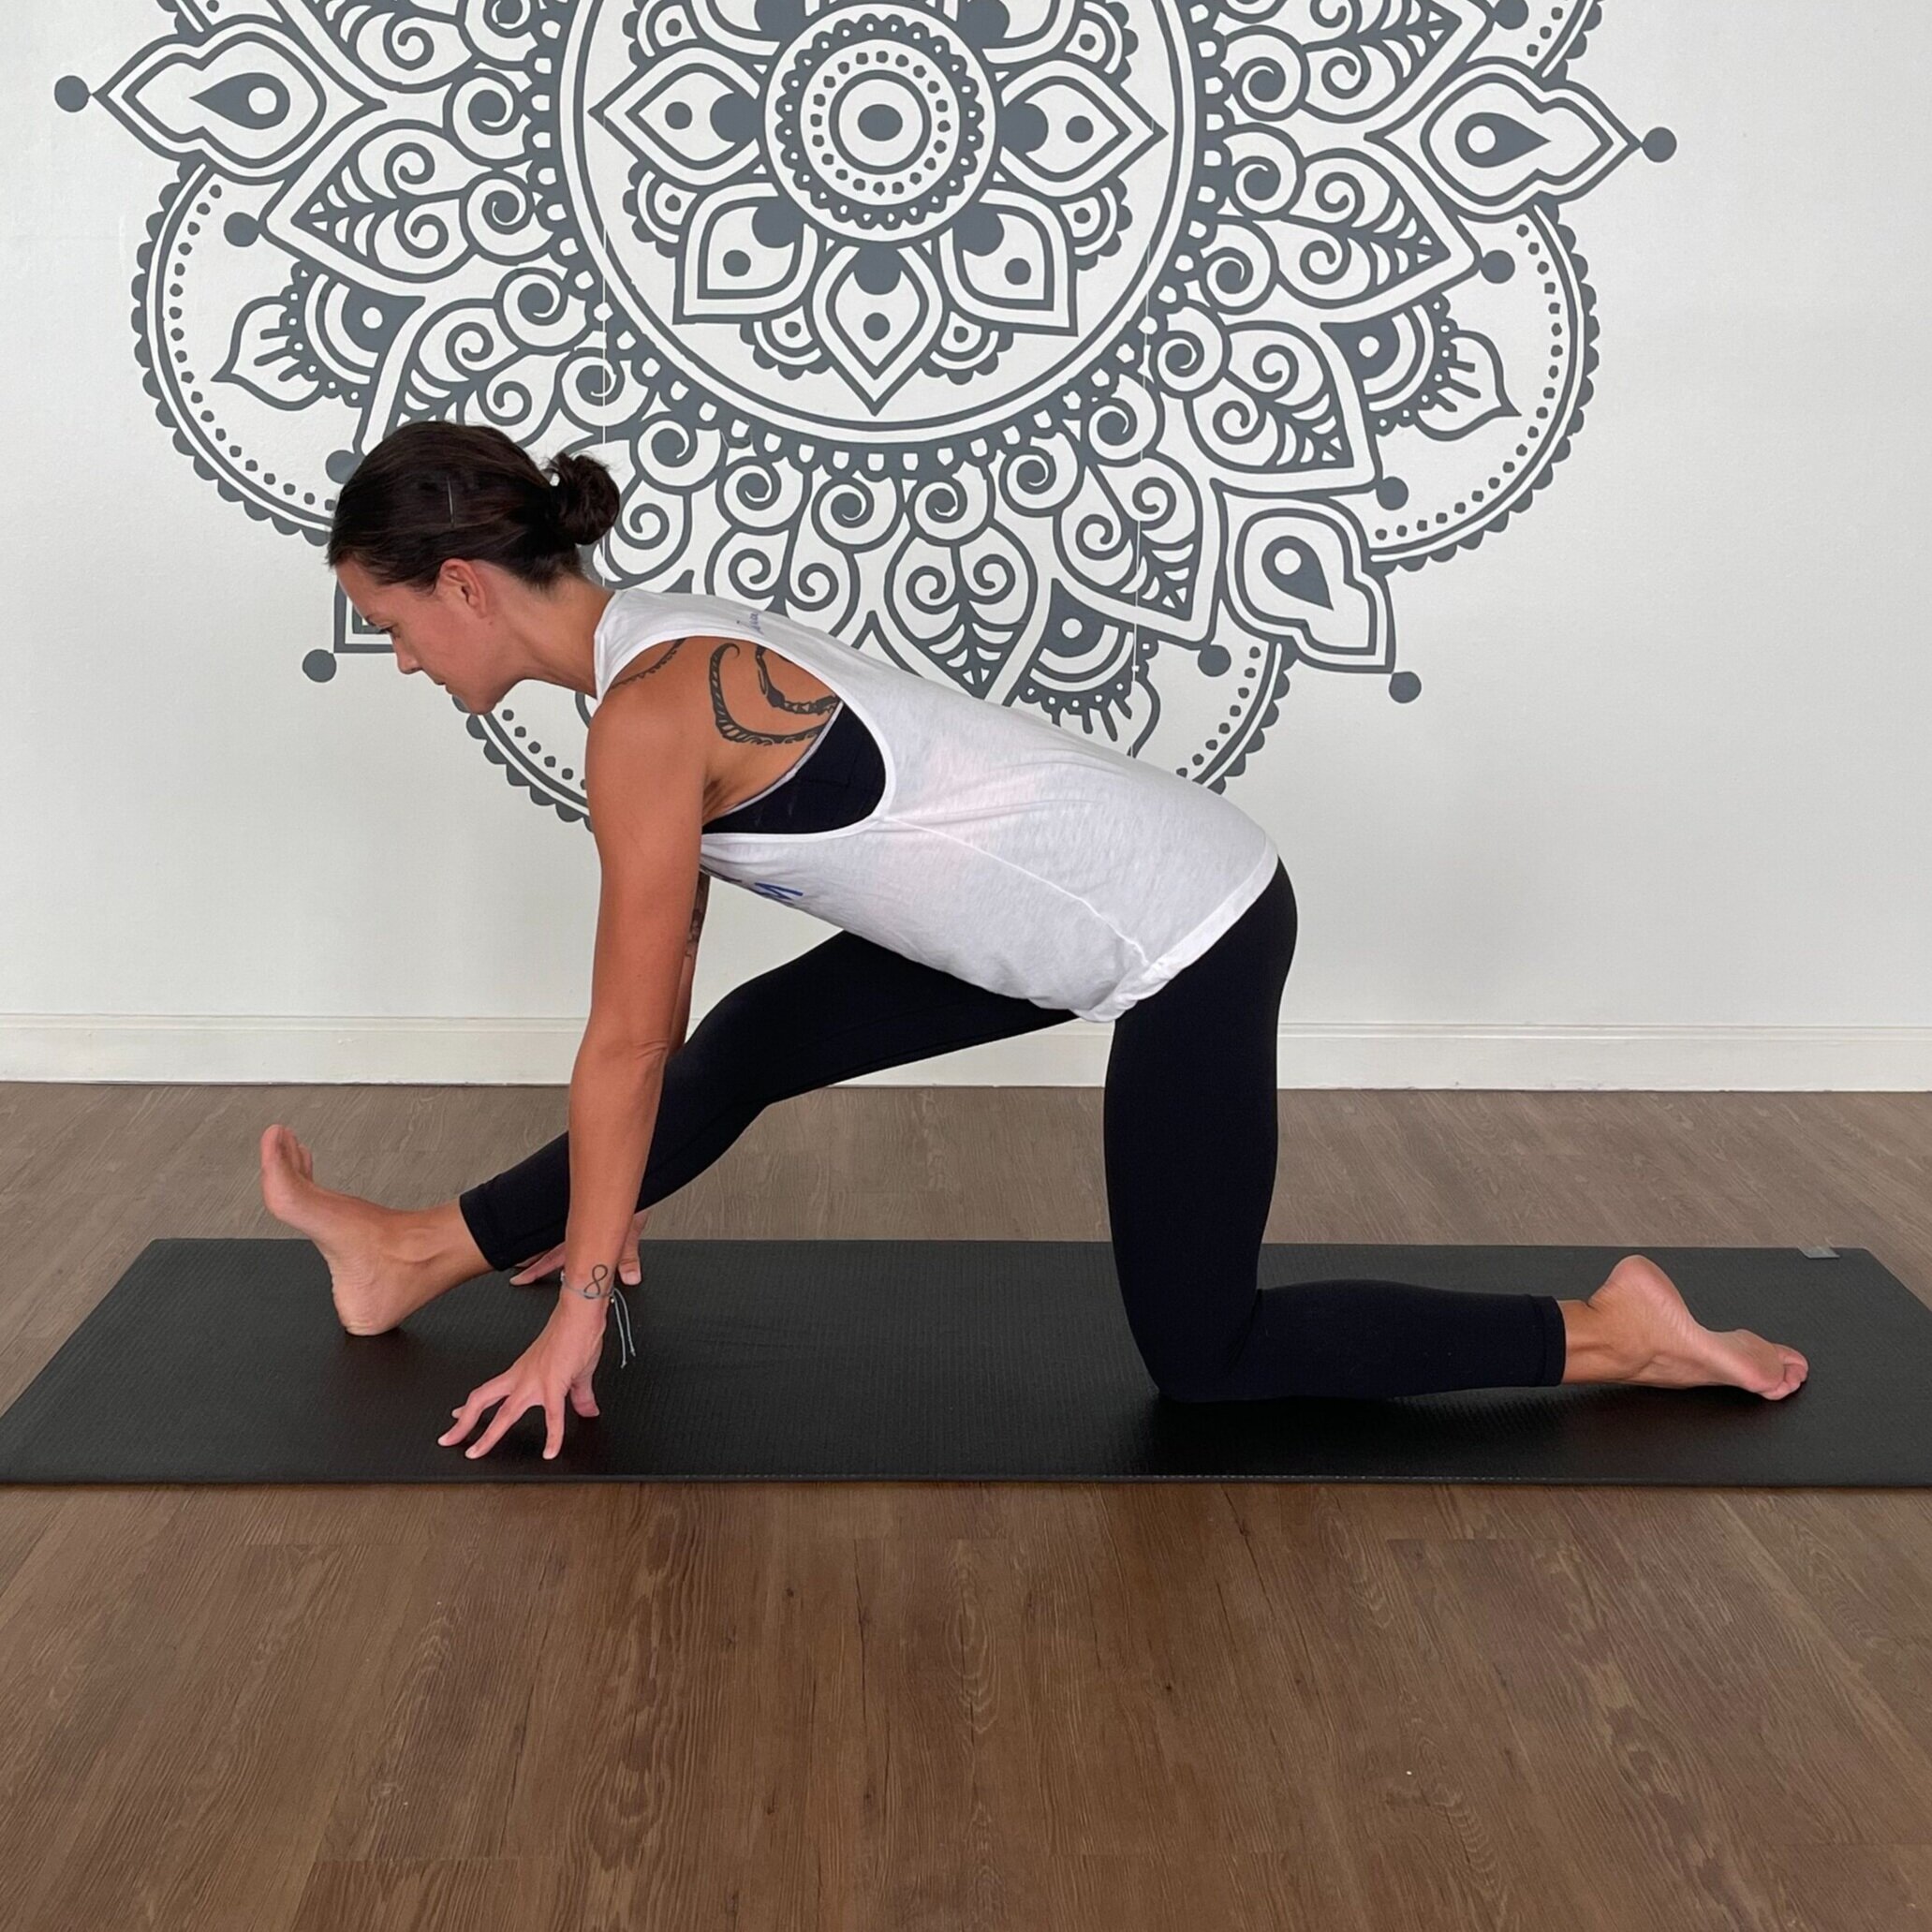
Runner’s Lunge
Target Muscles
Hips, hip flexors, psoas, and groin
Alignment Tips
Stand on your knees. Step one foot forward and out towards the front corner of your mat. Place both hands on the ground inside of your front foot to gently open your hip. Toe heel your front foot forward as much as you need to so that your knee stacks over your ankle.
Modifications:
Place blocks underneath your hands
Lower your back knee down onto the ground

Lizard pose (Utthan Pristhasana)
Target Muscles
Hips, hip flexors, groin, psoas, hamstrings
Alignment Tips
From runner’s lunge, lower down onto your forearms. Lift your back knee up and activate your core.
Modifications
Place blocks underneath your forearms
Lower down onto only one forearm
Lower your back knee down onto the ground
Runner’s Lunge with Quadricep Stretch (Utthan Pristhasana Variation)
Target Muscles
Quadriceps, groin, psoas, and hip flexors
Alignment Tips
From runner’s lunge, release your back knee to the earth. Then bend your back knee as you shift your hips forward. Ensure your front knee still stacks over your ankle, then turn in the direction of your front foot. Reach your hand for your opposite back foot and hug your heel towards your glute
Modifications
Use a strap between your hand and your back foot
Place a block underneath your front hand

Pyramid Pose (Parsvottanasana)
Target Muscles
Hamstrings and calves
Alignment Tips
Stand with your feet together and step one foot forward. Angle your back foot at about 45 degrees and press the outside edge into the ground. Fold forward over your straightened front leg and place your hands on the earth. Lengthen your spine forward as you energetically pull your front heel towards your back foot to deepen the stretch
Modifications
Place blocks under your hands to create more length in your spine
Step your feet closer together and lift your back heel up

Wide-legged Forward Fold (Prasarita Padottanasana)
Target Muscles
Hamstrings, calves, and hips
Alignment Tips
Widen your legs comfortable apart. Bend forward at your hips and bring your hands to the earth. Pull your heart forward and down to lengthen your spine. Shift your weight forward into your toes and tilt your hips up to feel the stretch between your hamstrings and glutes.
Modifications
Place blocks underneath your hands or forearms
Bend your knees

Standing Forward Fold (Paschimottanasana)
Target Muscles
Hamstrings and calves
Alignment Tips
Stand with your feet together. Bend at your hips and reach your hands for the floor, then micro-bend your knees and shift your weight into your toes
Modifications
Keep your feet hips-width distance apart.
Bring blocks underneath your hands to find stability in your fold
To deepen, lean your spine against a wall while folded
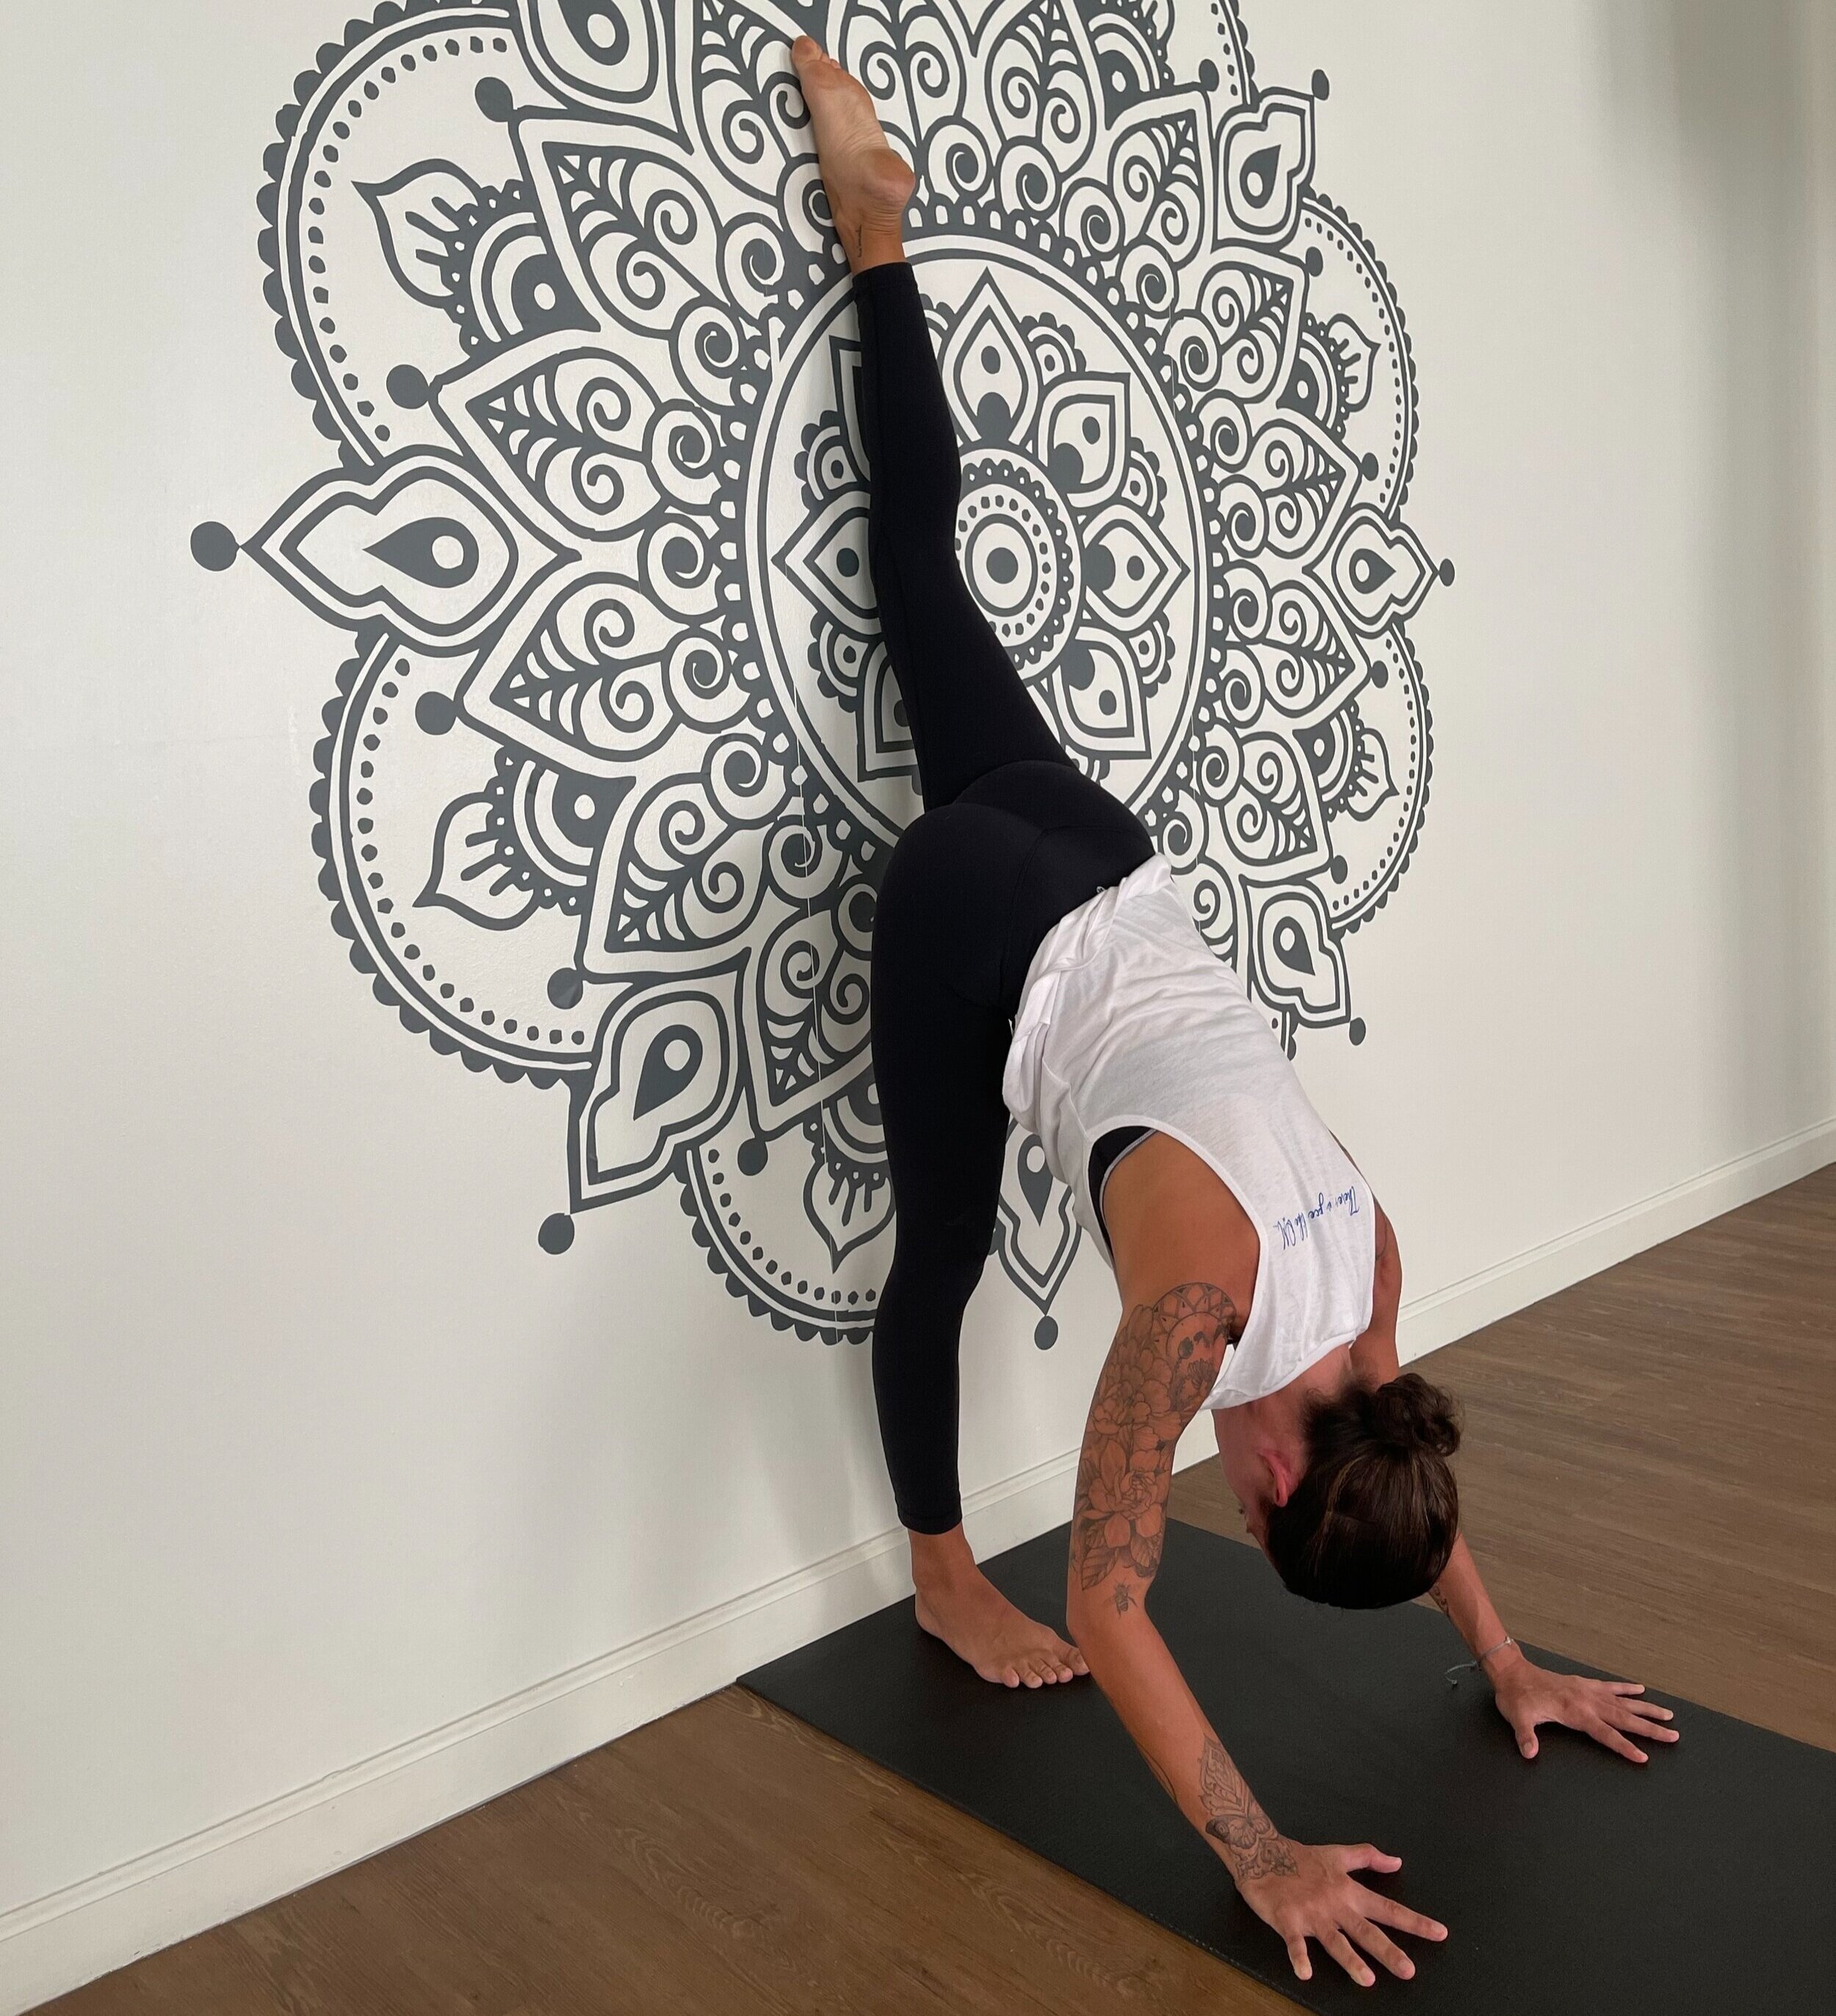
Standing Splits on the Wall (Urdhva Prasarita Eka Padasana)
Target Muscles
Hamstrings, calves, groin
Alignment Tips
Stand a few feet in front of a wall, facing away from it. Bend at your hips into a forward fold with your fingertips on the earth. Lift one leg behind you. Bend your knee as needed to maneuver the top of your foot against the wall, then slowly straighten your back leg up the wall. Walk yourself closer to/farther from the wall as needed.
Modifications
Practice without the wall (more strength, less stretch)
Place blocks underneath your hands/fingers

Seated Head to Knee (Janu Sirsasana)
Target Muscles
Hamstrings, hips, psoas, and groin
Alignment Tips
Sit on the ground with your legs out in front of you. Bend one knee and bring the sole of your foot to your opposite inner thigh, then turn your torso slightly toward your straight leg. Keep both hips grounded the whole time. Fold forward at your hips, leading with your heart to lengthen your spine. Rest your hands on the ground or reach for your shin, ankle, or foot
Modifications:
In the outer knee of your bended leg does not fall comfortably to the floor, support it with a block, pillow, or blanket
Place a folded blanket or pillow beneath your straight leg

Seated forward fold (Paschimottanasana)
Target Muscles:
Hamstrings and calves
Alignment Tips
Sit on the ground with both legs extended in front of you. Flex your toes back towards your face, micro-bend your knees, bend at your hips, and fold. Lengthen your spine by pulling your sternum forward.
Modifications
Place a folded blanket or pillow beneath your knees
Bend your knees

Half pigeon (Eka Pada Rajakapotasana)
Target Muscles
Hips and psoas
Alignment Tips
From table top or downward facing dog, bring your knee towards your wrist. Drape your shin down towards the top of your mat, close to parallel. Extend your opposite leg behind you. Keep both hips squared forward by isometrically pulling the hip of your bent leg backwards. Keep the top of your back foot on the ground.
Note: If your shin is close to parallel, flex your foot back towards your shin. If your foot is close to your opposite thigh, relax the top of your foot
Modifications
If your hips are not grounded, place a block under the glute of your bent leg
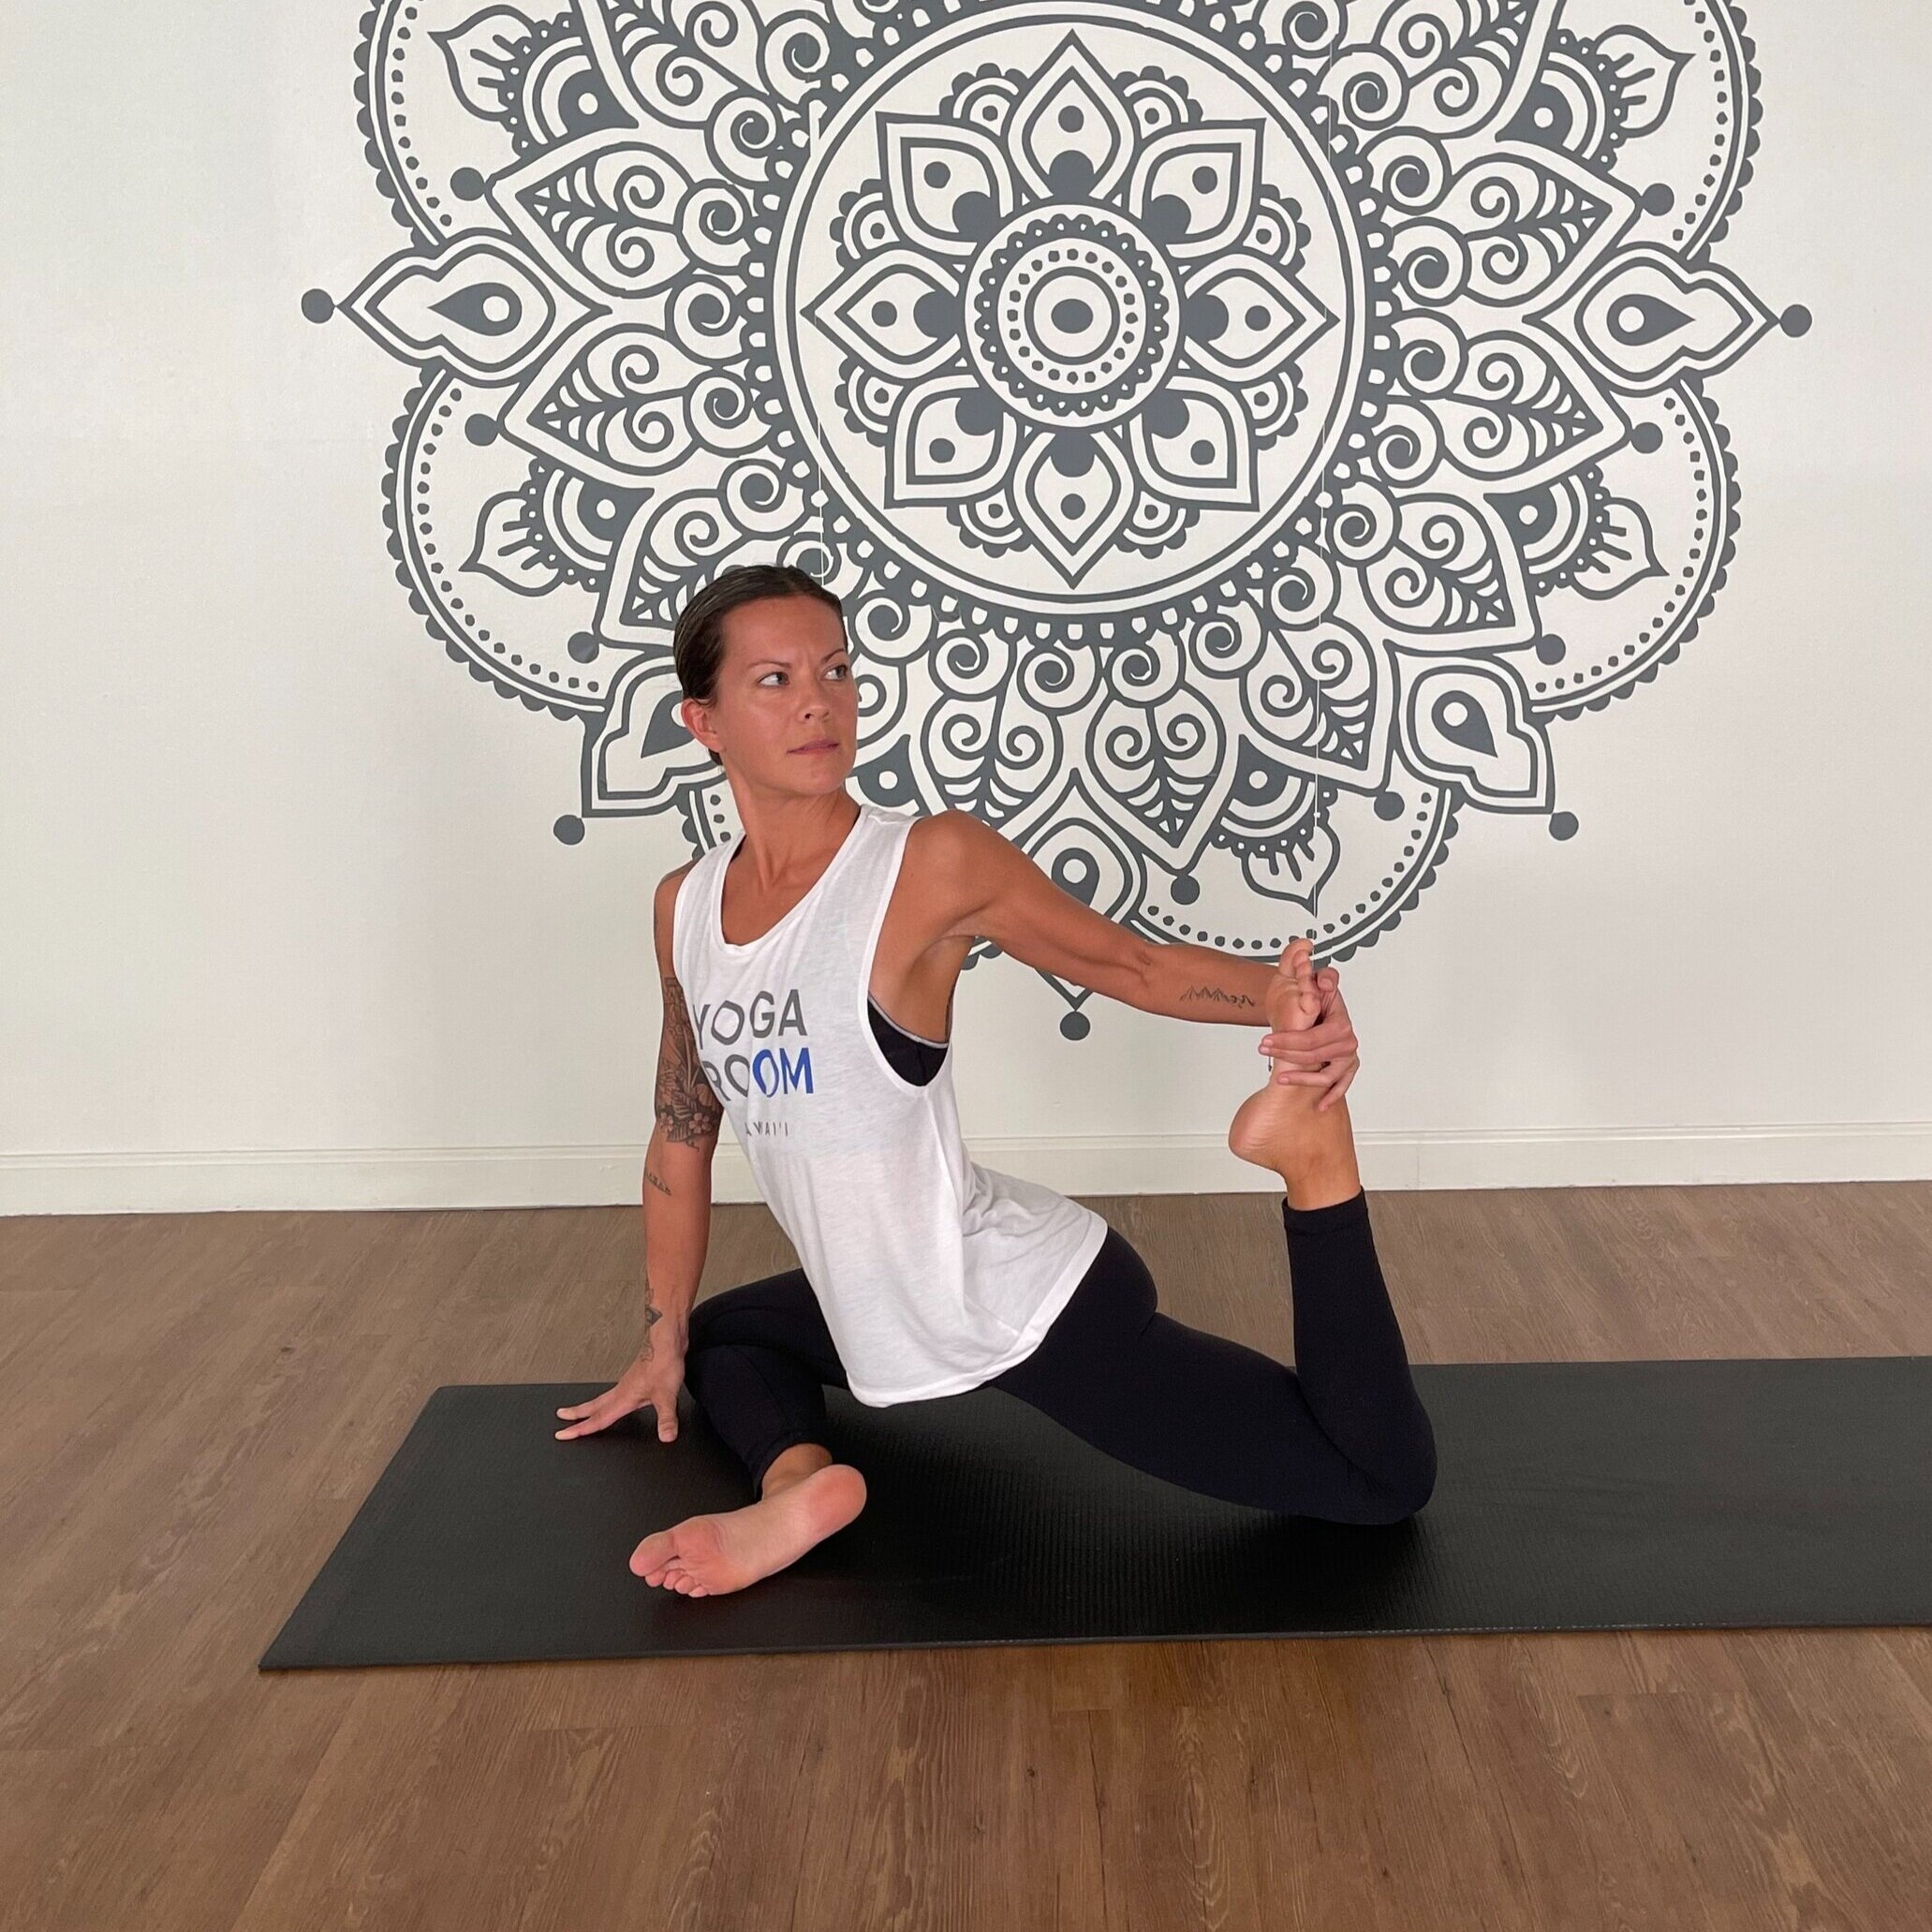
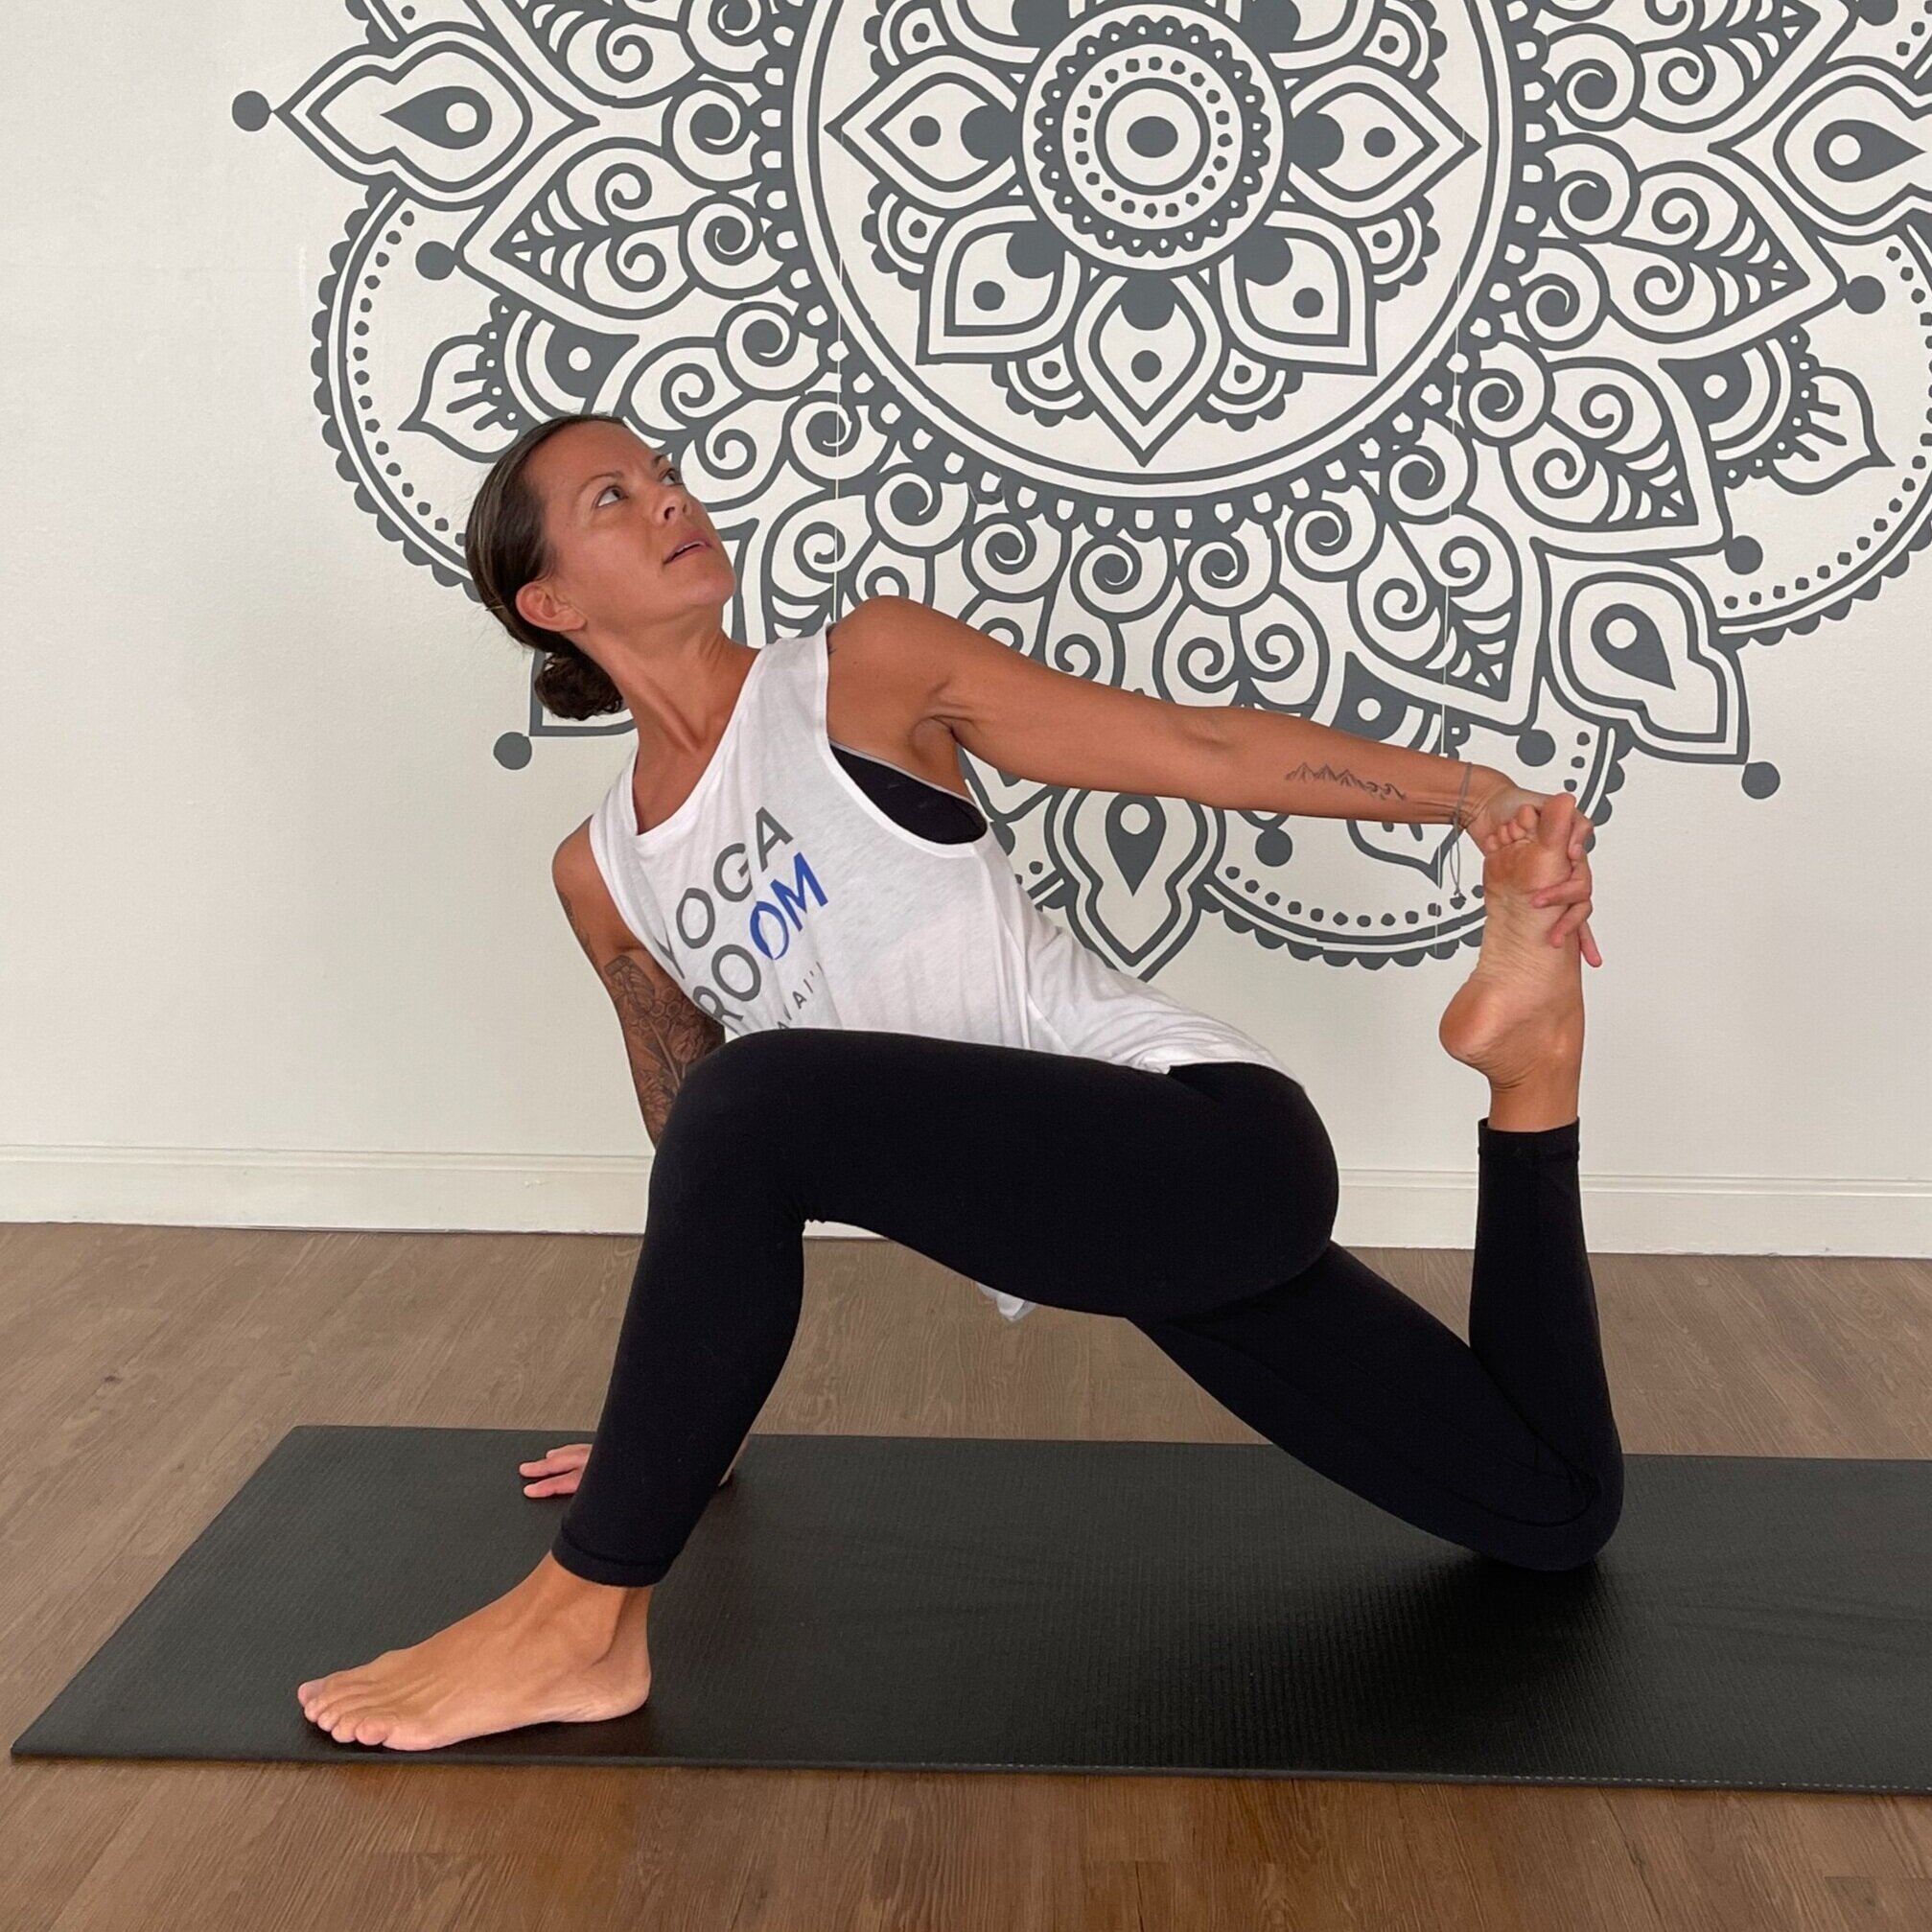
Half Pigeon with Quadricep Stretch
Target Muscles
Hips, psoas, hip flexors, and quadriceps
Alignment Tips
Ensure your hips are stable in half pigeon pose, then bend your back leg. Reach your hand back to grasp your corresponding foot (ex: right hand to right foot). Pull your heel towards your glute until your feel your quadricep stretch.
Modifications
Place a block underneath the glute of your bent leg
Use a strap around your back foot to pull your heel in
How To Safely Move Into Splits


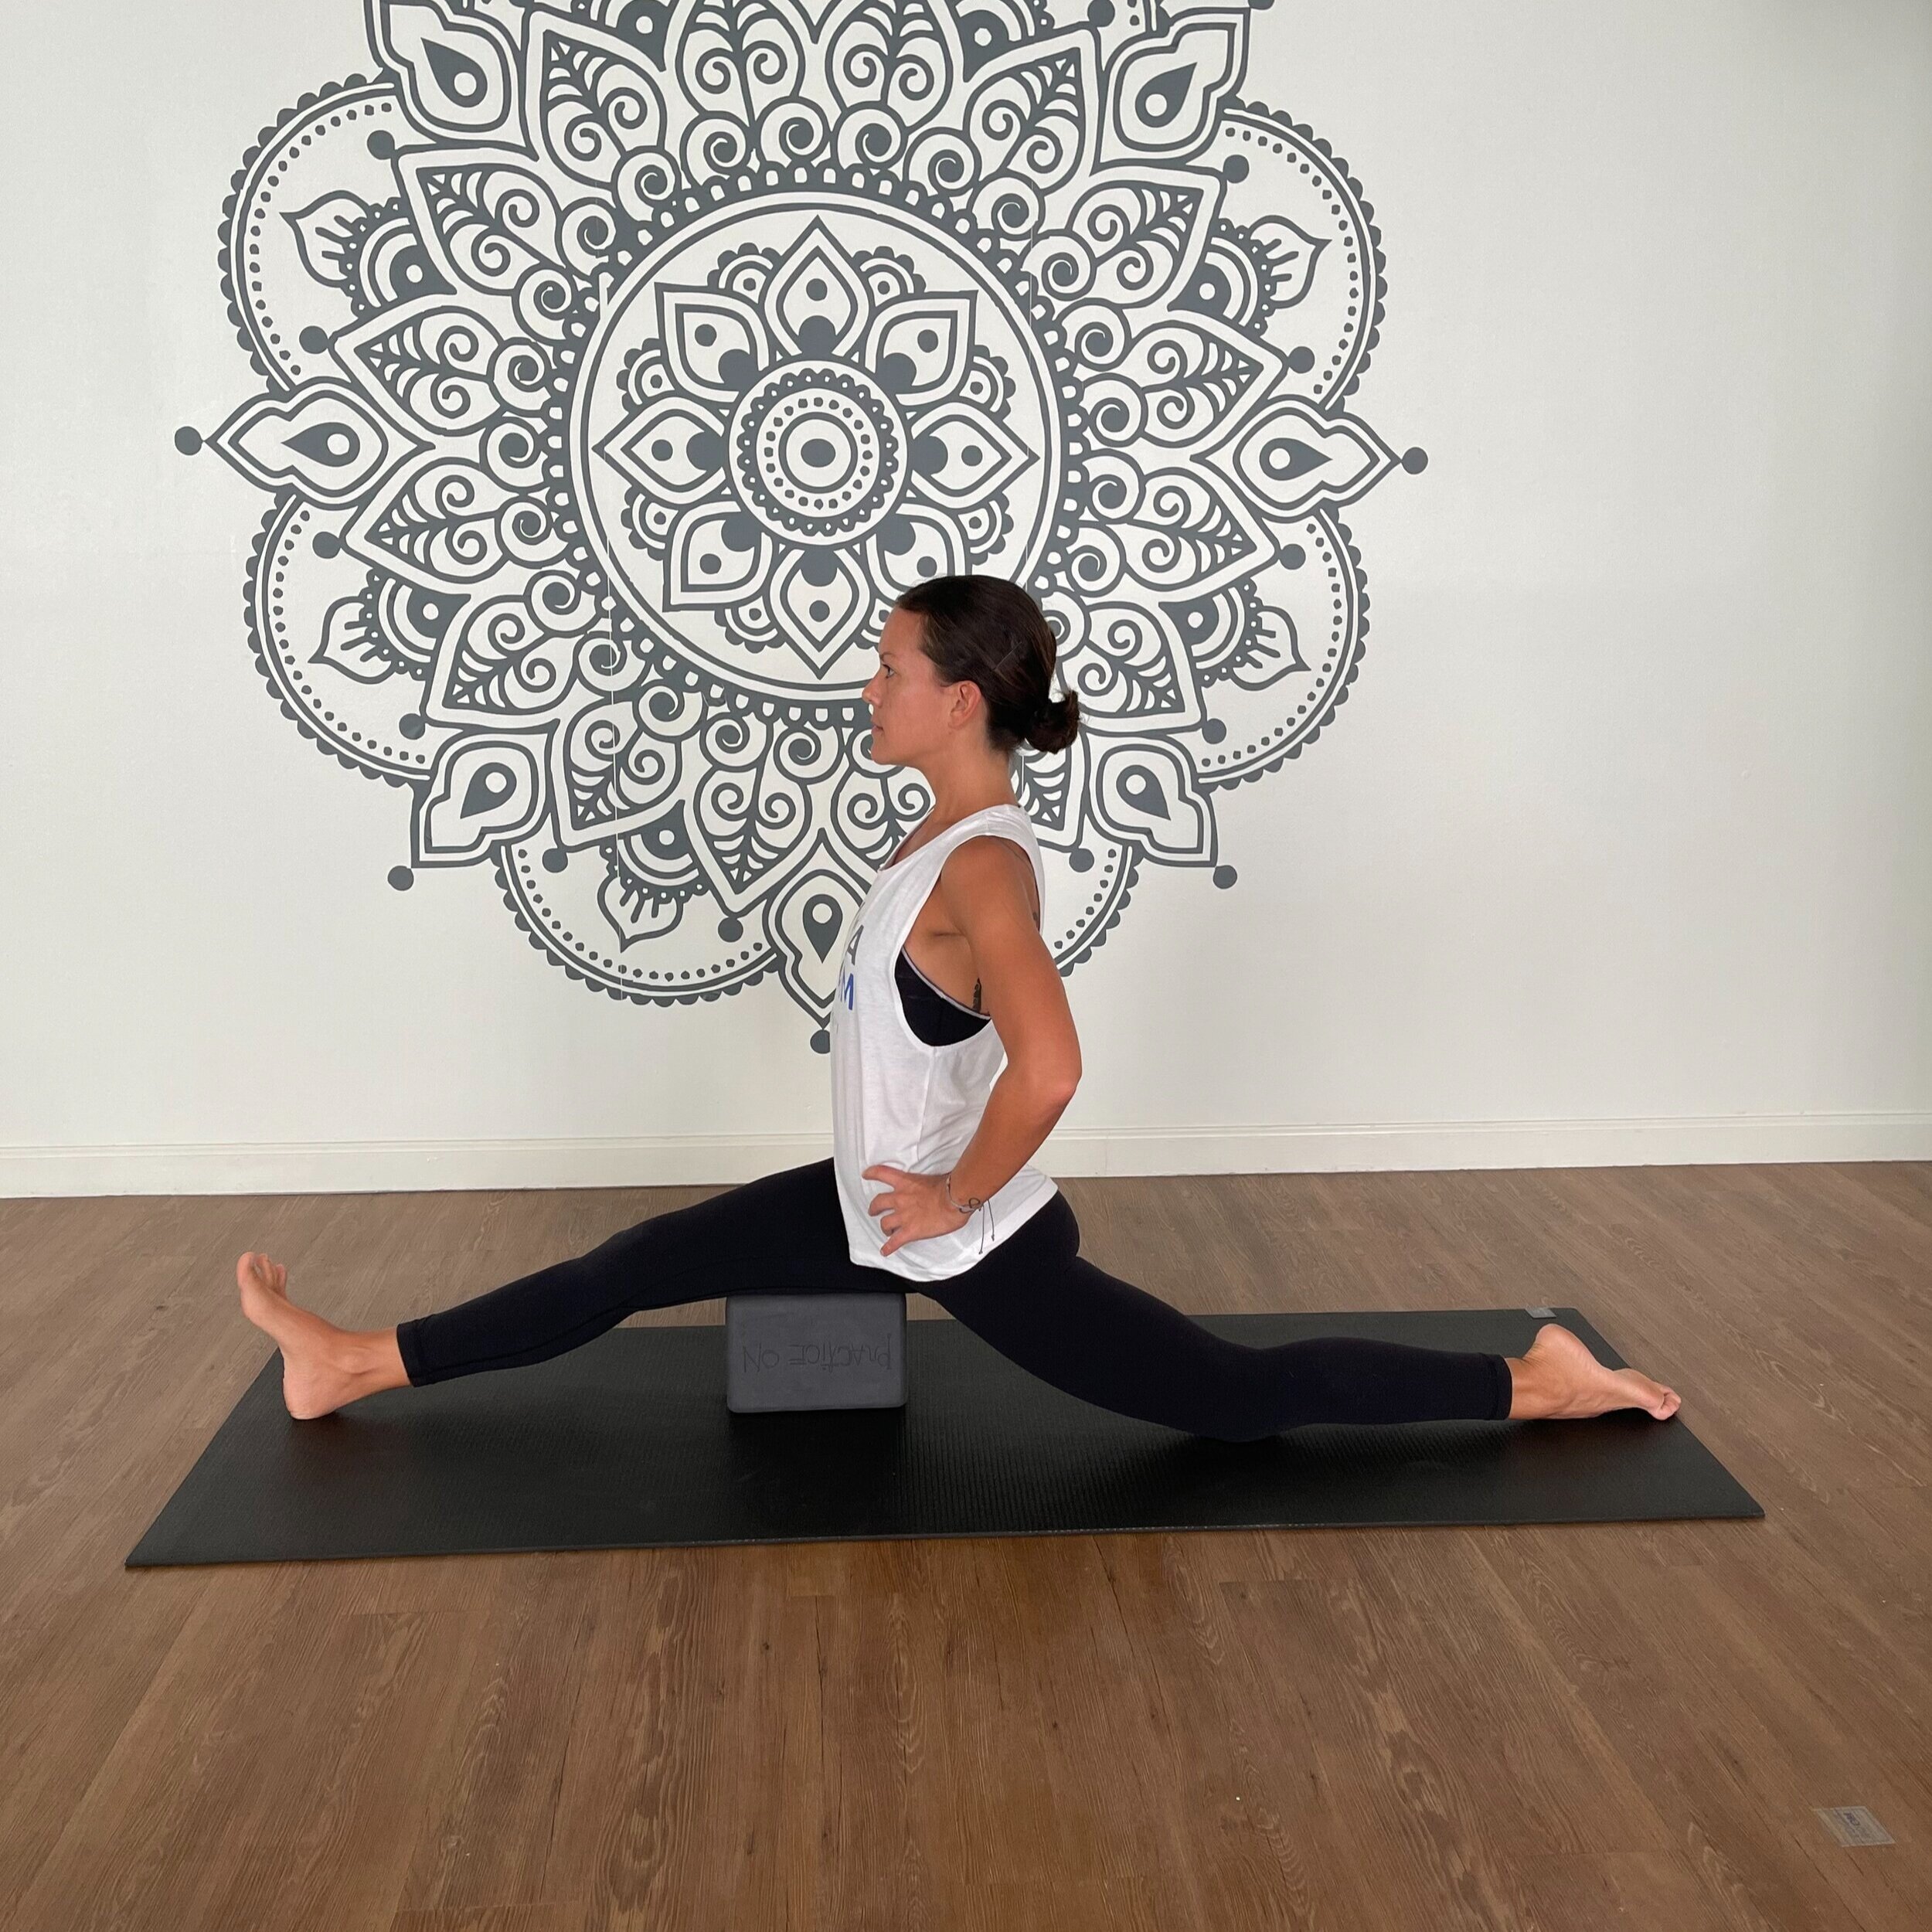
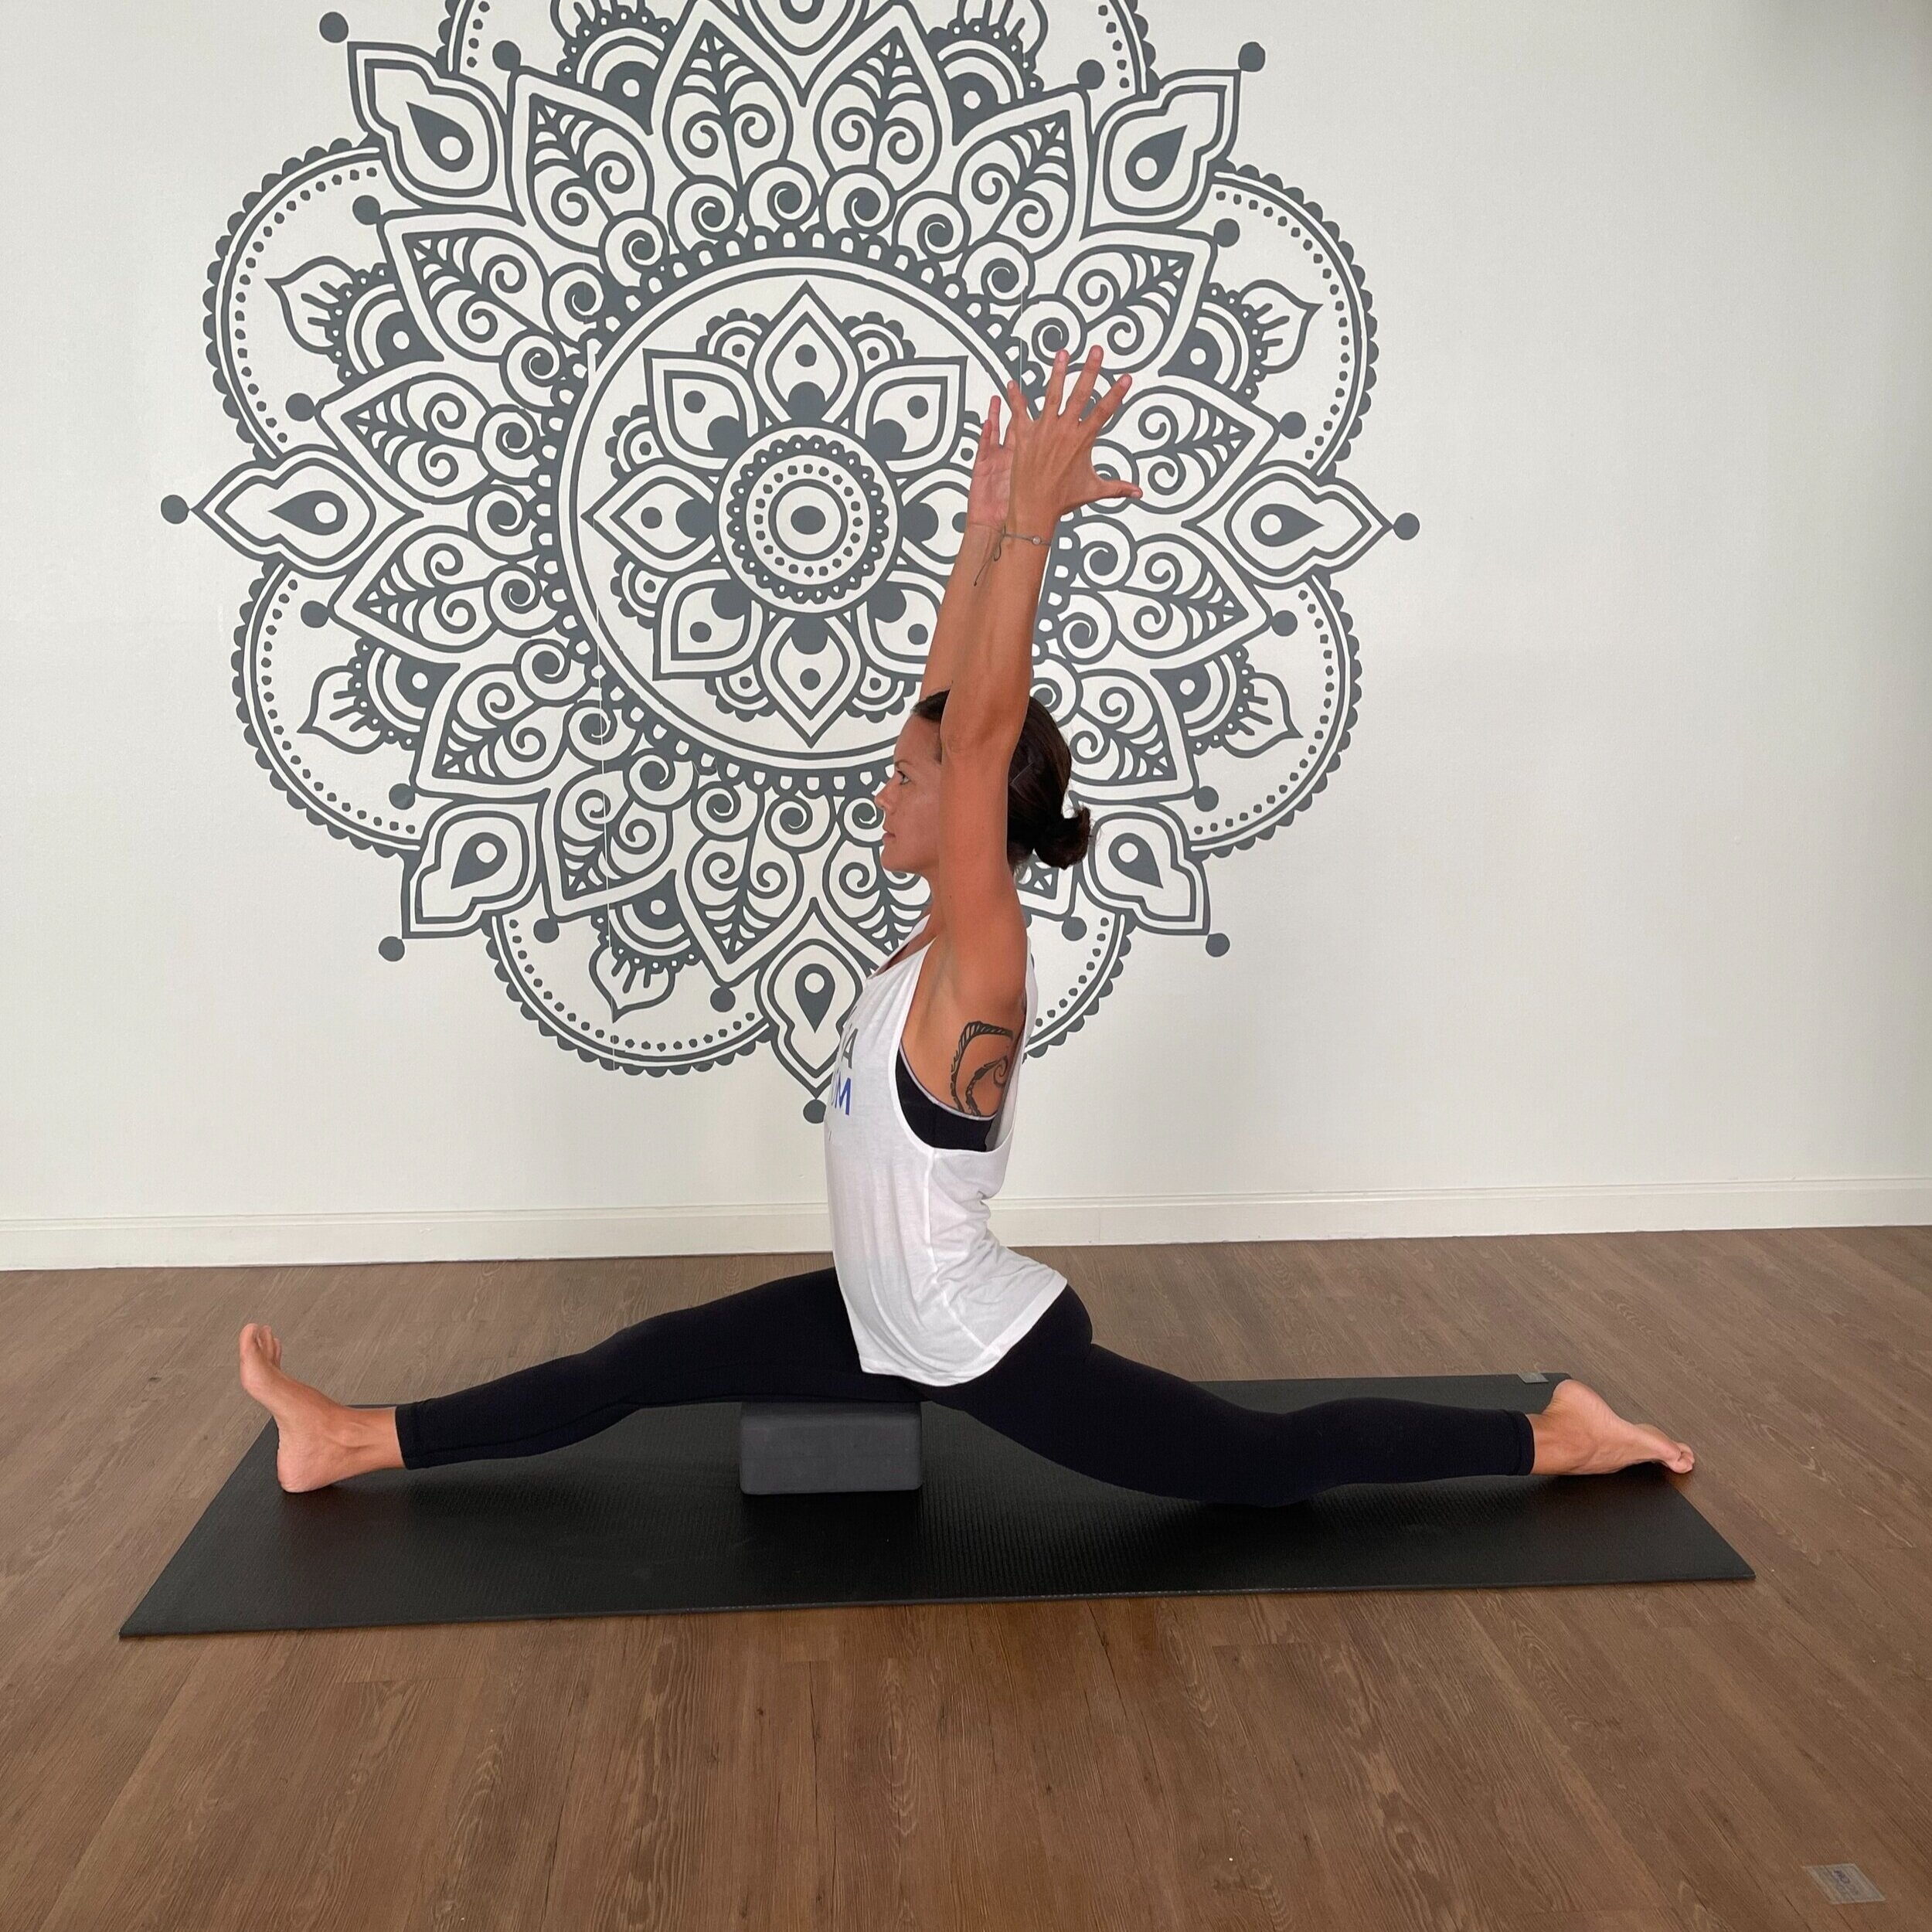
Full Splits with Blocks (Hanumanasana)
Target Muscles
Hamstrings, quadriceps, groin, hip flexors, hips
Alignment Tips
From standing on your knees, step one foot forward into a Crescent Moon pose. Slowly start to slide your front foot forward. Place a block under your front thigh at a comfortable height when you still feel sturdy. Lengthen your spine, activate your core, and sit up tall.
Over time, as you get more flexible, you can move the block to lower levels - as shown above. Add challenge by reaching your arms over head or folding forward over your front leg.
Modifications
Place multiple blocks underneath your front thigh
Place blocks underneath your hands for more stability
Full Splits Without Props
Make your way into Crescent Moon (Anjaneyasana), with one foot forward and your back knee on the ground. Take one block under each hand and slowly start to inch your front foot forward. Lift your toes so that your heel is leading the movement. As you lower your pelvis towards the floor, use your hands on blocks, props, or the earth to lower with control. Stop at a point where you feel stable, no matter how far you are from the ground. Sit up tall, engage your core, relax your shoulders, and breathe.


