11 Yoga Arm Balances to Advance Your Practice (with Modifications)
Arm balances may look intimidating, but with the right foundation and knowledge, you can move into even the most difficult yoga postures with safety and confidence. Using our expert tips and tricks, you’ll find yourself getting comfortable on your hands in no time.
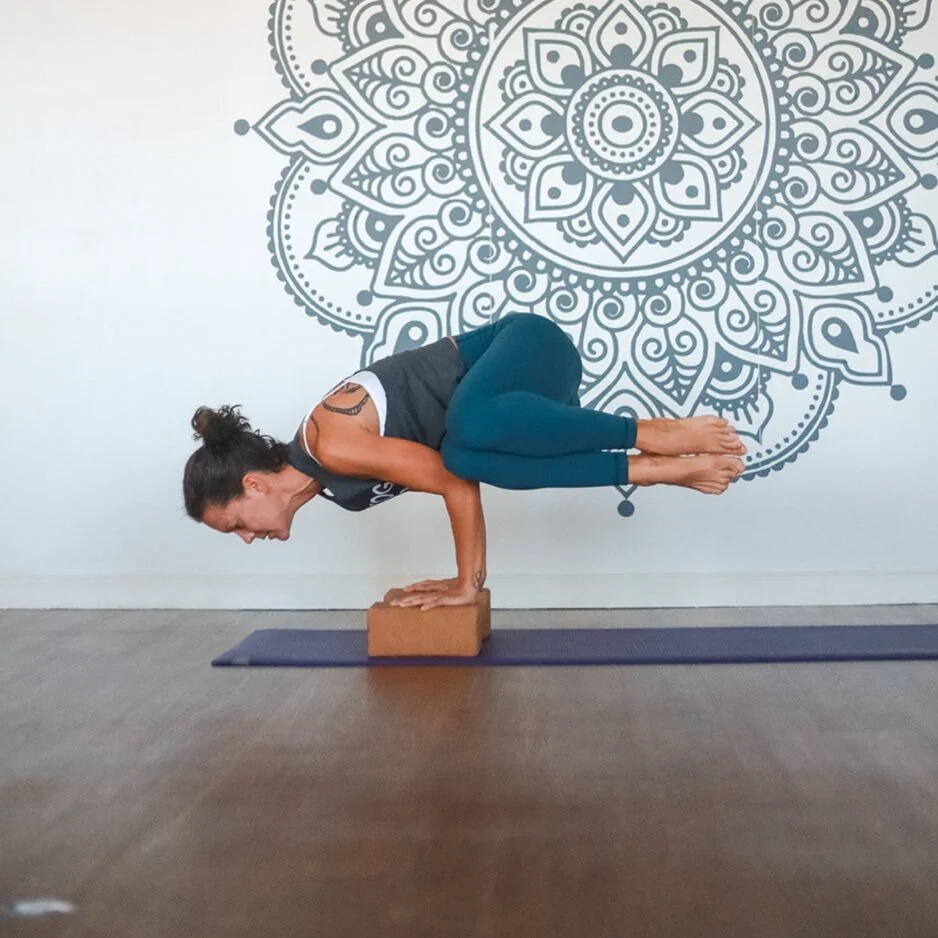
Crow Pose (Bakasana)
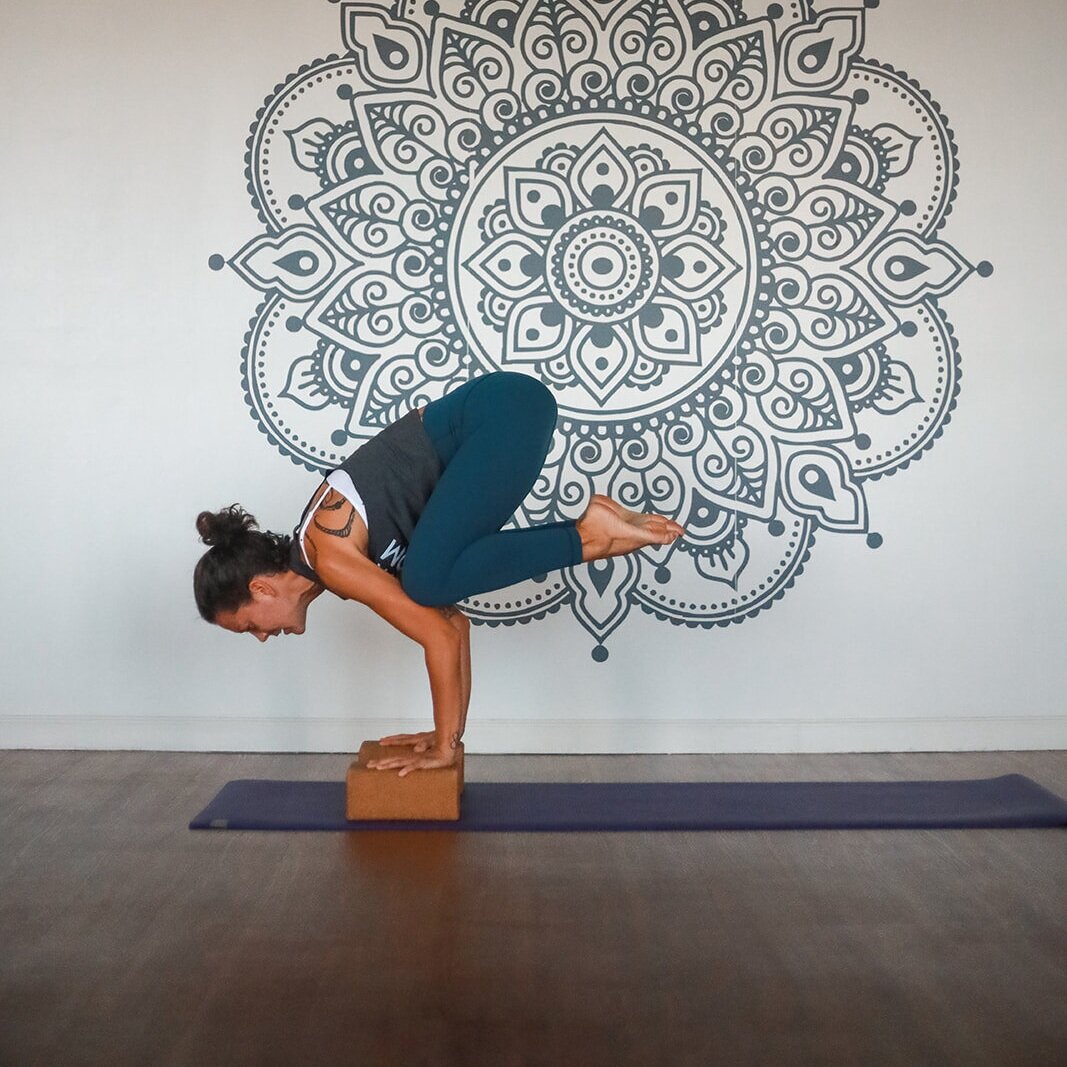
Crow Pose is a common beginner arm balance for yoga practitioners because it’s stable and close to the ground. While it may look like a lot of shoulder strength, it’s actually mostly balance! The trick is to find your center of gravity by shifting your weight forward.
How to move into Crow Pose:
Start in a halfway lift. Place your hands on the ground with your fingers spread wide, and grip the earth firmly. Bend your elbows and place your elbows on the backs of your thighs. Gaze forward about two feet, and start to shift your weight forward until your toes feel light - further forward than you think. Hug your heels up towards your glutes.
Tips for Crow Pose:
Rotate your hands slightly outward so that your pointer finger points straight forward. This helps keep your elbows hugged in.
Keep your hips up high! The higher your hips are, the lighter you’ll feel.
Make sure you rest your knees on the backs of your triceps rather than on your outer arms. Wearing long, fitted pants can help with traction.
The higher your knees are on your triceps, the easier it will be to lift your toes. Stretch out your hips before getting started, and aim for your armpits!
2. Headstand (Sirsasana)

After side crow, supported headstand is one of the most popular beginner inversions in yoga. And while it’s more of a head balance than an arm balance, it’s a popular peak pose because you get fully upside down. If you’re working on getting a forearm stand or a handstand, mastering a headstand is a great place to start.
How to move into Supported Headstand:
Start kneeling on the ground. Interlace your fingers and bring your forearms to the ground, keeping your elbows at shoulder-width distance. Tuck your chin into your chest and place the crown of your head on the earth. Tuck your toes and lift your knees, then slowly start to walk your toes in towards your head. Draw one knee and then the other into your chest. Once you find your balance, press your feet skyward.
Tips for Supported Headstand:
Press your forearms into the ground and magnetize your elbows towards one another. This activates your shoulders and back while taking pressure out of your neck.
Walk your toes as far forward as possible. The higher your hips are, the easier it will be to lift your toes off the ground.
Squeeze your inner thighs together when you press your legs up.
3. Forearm Stand (Pincha Mayurasana)
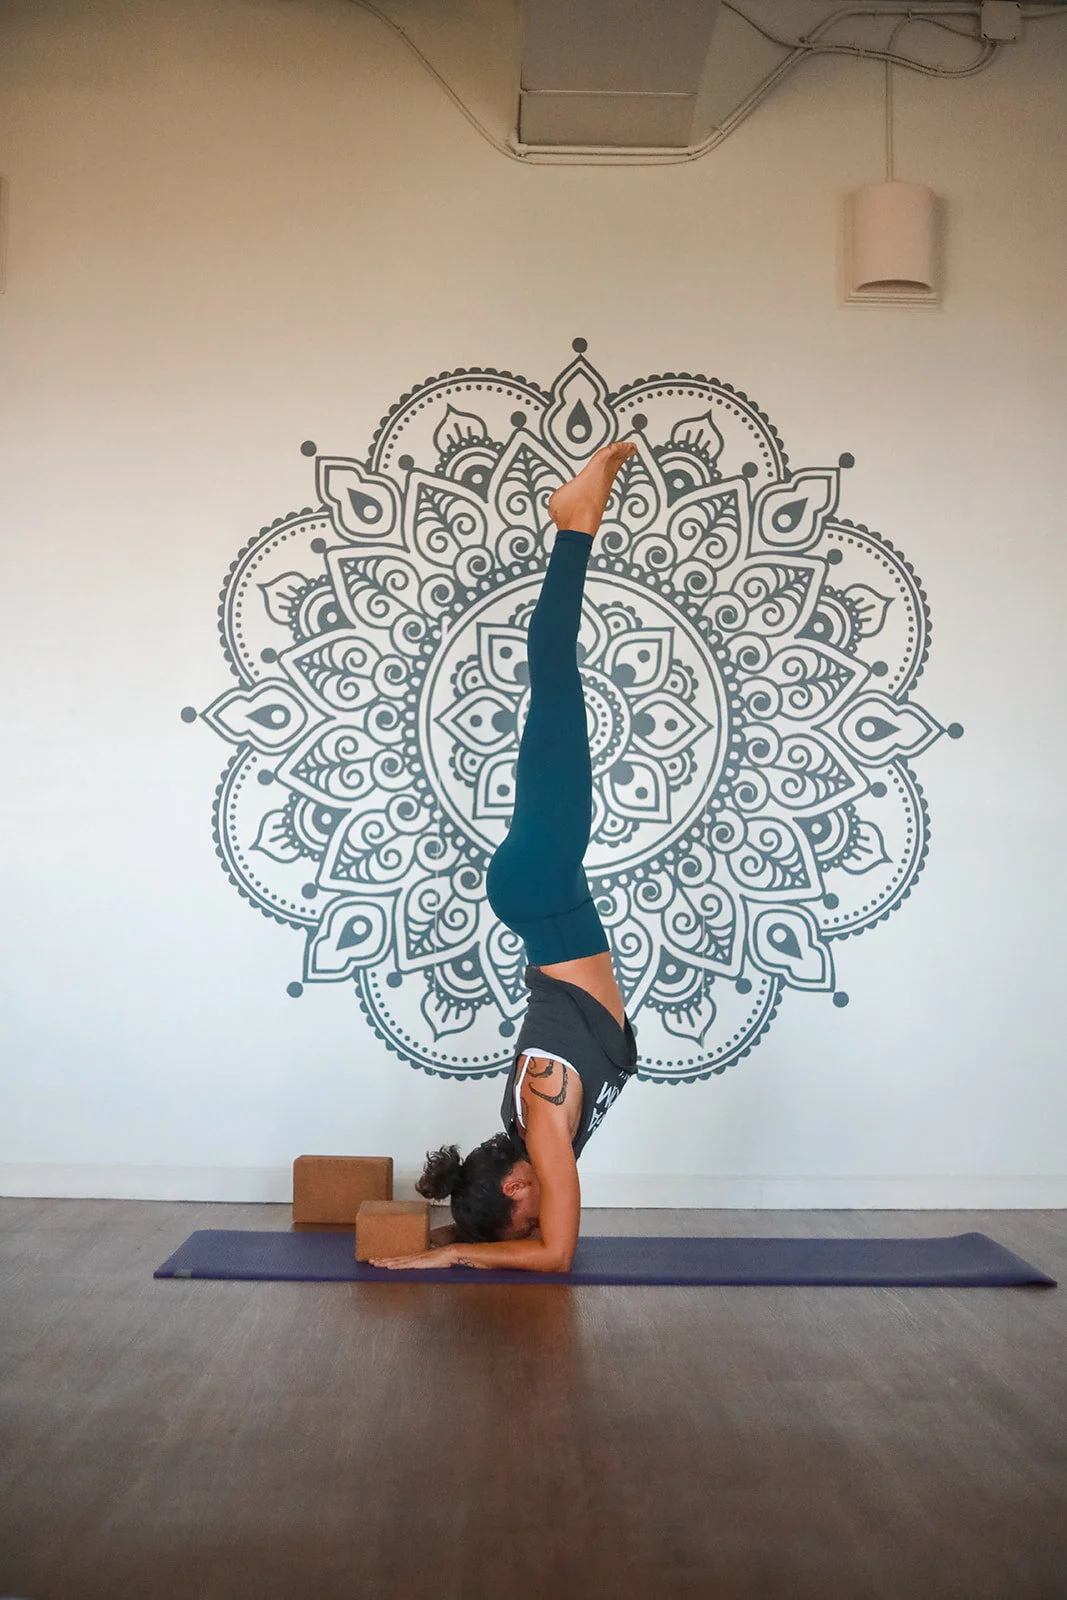
Practicing forearm stand is a great way to build strength for your yoga practice in your shoulders and back. While some people bring their hands together, keeping your arms parallel will help activate your serratus anterior, an important muscle for all advanced arm balances.
How to move into Forearm Stand:
From table top, drop down to your forearms. Keep your forearms parallel to each other with your hands and elbows at shoulder-width distance. Tuck your toes to lift your knees, and walk your toes in towards your chest. Press into your hands. Lift one leg up high, micro-bend your bottom knee, and take gentle hops up. Once you find your point of balance squeeze your legs together.
Tips to move into Forearm Stand:
Press into your hands a lot! This helps activate your shoulders and chest.
There’s a tendency for the elbows to splay out, so hug your elbows towards one another to stay stacked.
Set your gaze directly down. If you gaze too far forward, you’ll invite a curve into your lower back
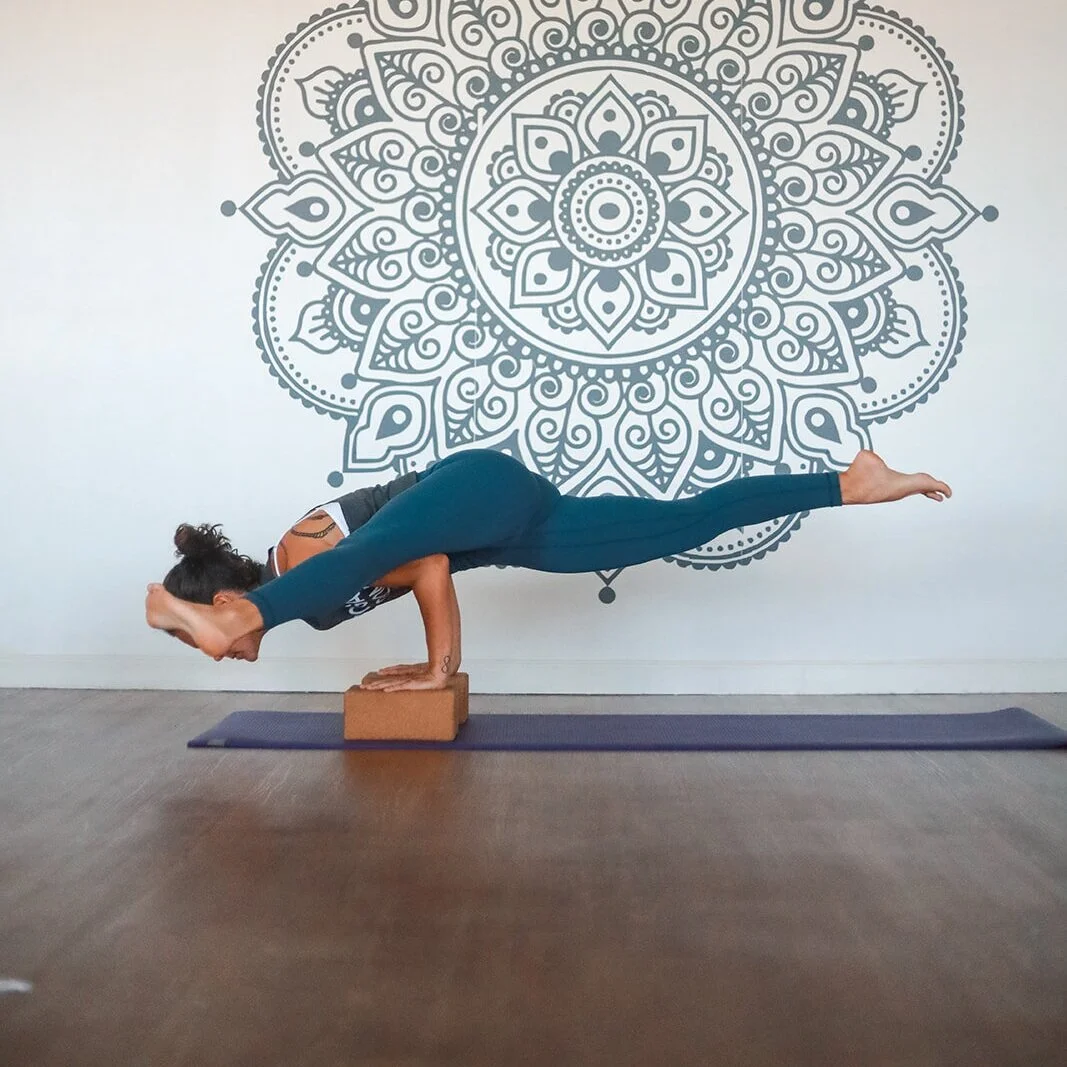
4. Firefly Pose (Titibasana)

Firefly (Titibasana) is one of the most difficult yoga poses to master because it requires lots of strength and flexibility. There are many ways to modify this pose to make it more accessible, so start slowly based on what feels good in your body.
How to move into firefly pose:
Start in forward fold with your feet slightly wider than hips-width distance. Start to bend your knees and walk your hands slightly behind your feet. Place your palms on the ground. Wrap your legs around your shoulders, bending your knees as much as you need. Then drop your sit bone down towards the ground until you are essentially sitting on your own shoulders and triceps. Slowly start to straighten your legs.
Tips to move into Firefly Pose:
Squeeze the backs of your thighs into your arms and your arms into your thighs
Keep your elbows slightly bent to start. You can start to straighten your arms more over time
Shift your shoulders slightly forward. The slight lean forward allows you to find lightness in your feet.
Bend your knees a little - or a lot!
5. Hurdler’s Pose (Eka Pada Koundinyasa II)
If you have open hips, you’ll probably love the combination of flexibility and strength needed for hurdler’s pose. Since it’s fun to add to vinyasa flows, it’s a popular favorite for yoga practitioners!
How to move into hurdler’s pose:
Start in a downward facing dog. Lift one leg up high into three-legged dog. Then, hug your knee towards the outside of your elbow (on the same side). Gaze forward and start to bend your elbows back so that your inner thigh rests on your tricep. Activate your back leg to lift your toes off the ground.
Tips to move into hurdler’s pose:
Squeeze your thigh and elbow into one another to find strength and balance.
Bring your inner thigh as high up onto your tricep as possible.
Gaze forward to find your center of gravity. If your chest dips significantly towards the ground, press more into your palms and squeeze your elbows in.
You can rest the hip bone of your back leg on your tricep to help you find more stability and support in your upper body.
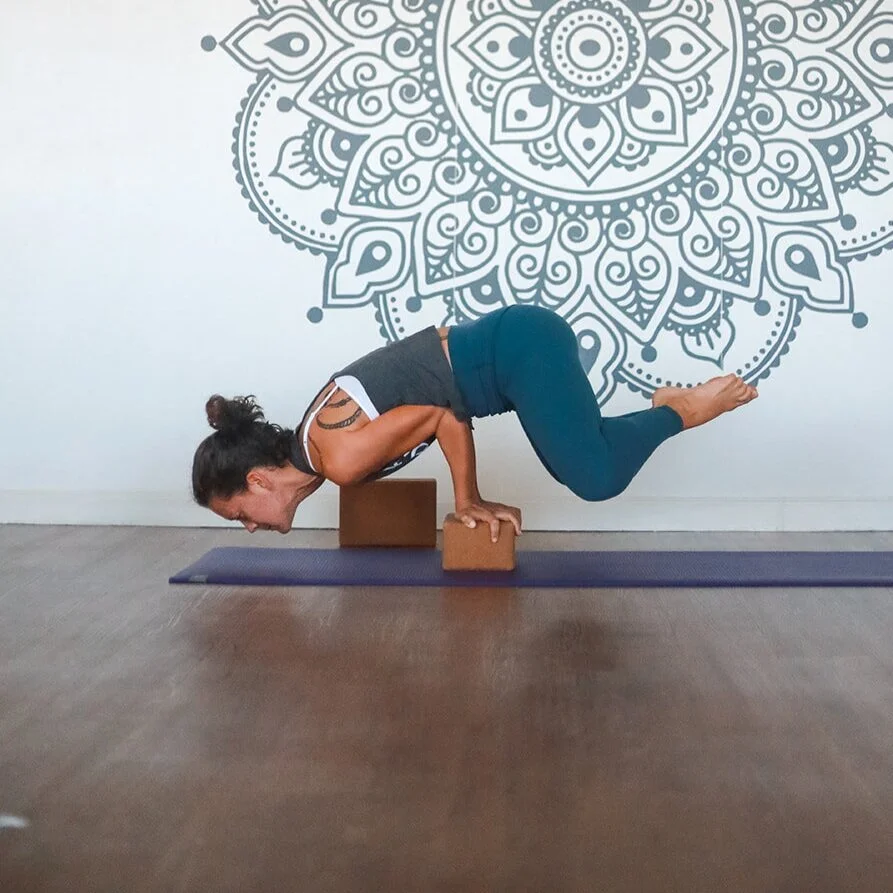
6. Side Crow (Parsva Bakasana)
There are a few ways to practice side crow, but the most accessible version involves balancing your outer thigh across both triceps. If you’re flexible in your twists, you might even find side crow less difficult than crow pose because of the added support.
How to move into side crow:
Start in a tuck squat on the ground. Twist your body to one side and plant your palms on the earth. Bend your elbows and press your outer thigh into your triceps. Start to lean forward and gaze forward. When you find your center of balance, float your toes off the ground.
Tips to move into side crow:
Squeeze your inner thighs together.
Prioritize keeping your elbows hips-width distance apart on your thigh.
Avoid dropping all your weight into your hip. Let the weight be equal between your front and back elbow.
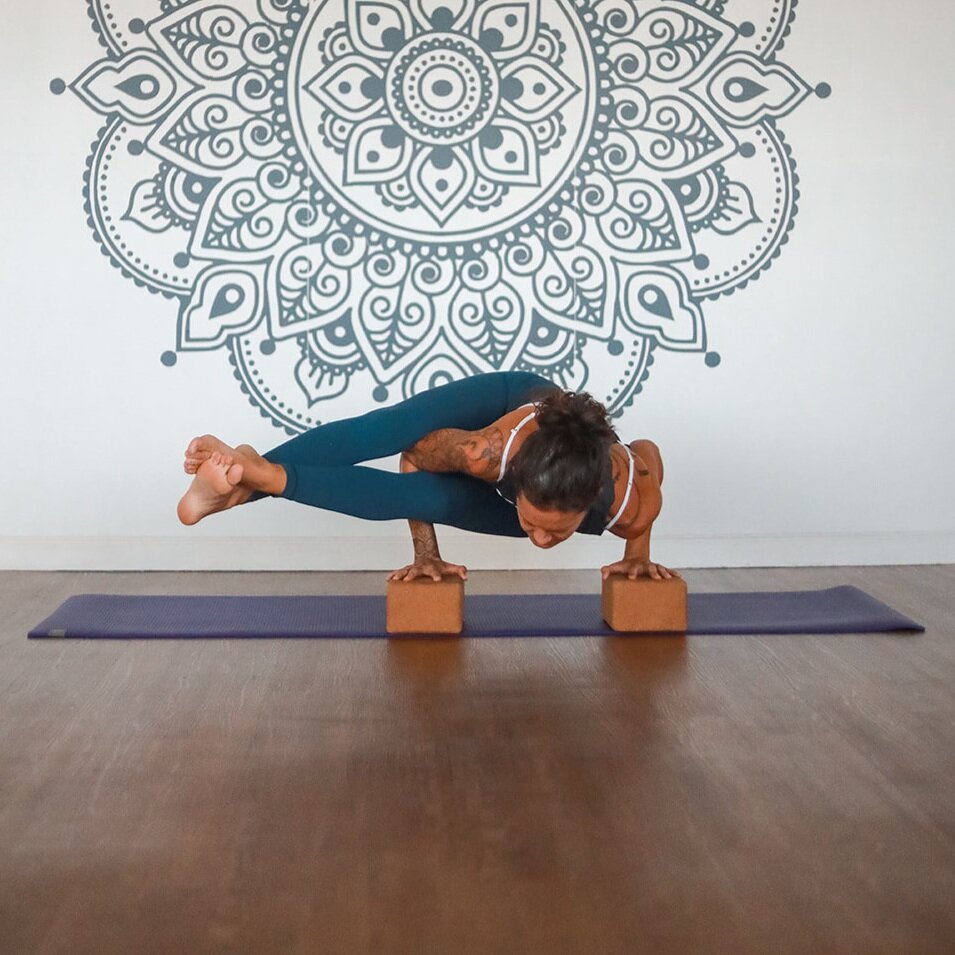
7. Scissor Leg Side Crow (Eka Pada Koundinyasana I)

If you’ve gotten comfortable in side crow, it may be time to try the scissor leg version. Eka pada koundinyasana I is a more challenging yoga posture for your strength and balance.
How to move into scissor leg side crow:
Like in side crow, start in a tuck squat on the ground. Twist your body to one side and plant your palms on the earth. Bend your elbows so you can press your outer thigh into your triceps. Lean forward and gaze a few feet forward. When you find your center of balance, float your toes off the ground. Start to extend your top towards the back of your mat, and straighten your bottom leg out to the side.
Tips for scissor leg side crow:
When you extend your top leg back, your center of gravity will change. Move slowly and squeeze the muscles in your leg to stay stable.
Flex your toes to keep your legs active.
Press the earth away with your palms to stay lifted in your chest.
8. Peacock Pose (Mayurasana)
Peacock Pose has a different center of gravity than most other arm balances in yoga due to the direction of your hands and wrists. You’ll want to warm up your wrists before beginning, as it requires wrist flexibility and strength.
How to move into peacock pose:
From table top pose, flip your palms so that your fingers face back towards your knees. Lean your shoulders forward and start to bend your elbows. Allow your head to come down towards the mat. Tuck your toes to lift your knees off the earth, and shift your weight forward into your upper body. Squeeze your inner thighs and start to lift your toes off the ground, one foot at a time.
Tips to move into peacock pose:
Keep your elbows narrow and hugged in together to balance your torso on your elbows.
Remain in a near-upright position in your upper body to avoid overstretching your wrists.
Play with a variety of leg positions to find one that works for you.
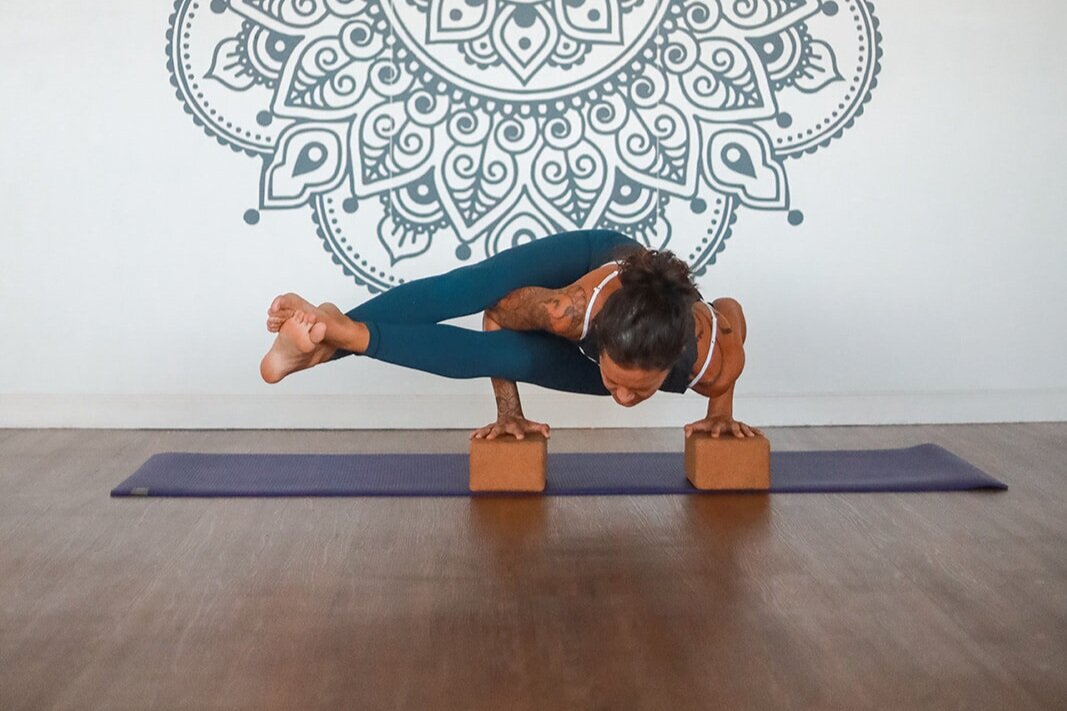
9. Eight Angle Pose (Astavakrasana)
Eight Angle Pose is all about finding lightness in your lower body. Like Hurdler’s Pose, Eight Angle becomes easier when you have open hips, so warm up your hip flexibility before you try it on.
How to move into Eight Angle Pose:
Start in a comfortable easy seat. Start to hike your left leg over your shoulder like a backpack. Press your leg into the back of your arm and shoulder so that you leg stays in place. Then, place your hands gently on the ground in front of you. Attempt to keep your thigh on your shoulder, so plant your left hand where it needs to go and your right hand shoulder-width distance accordingly. Shift your weight slightly into your right hip and lift your right foot to cross over your flexed left foot. Bend your elbows as you gaze and lean forward. Press your top leg onto your arm to lift your hips. Kick your feet out to the side as you squeeze your left arm tightly between your thighs.
Tips for Eight Angle Pose:
If your leg falls off your shoulder after you plant your hands on the earth, that’s okay! Make sure it sticks to the back of your arm.
Squeezing your thighs around your arm is what helps you float your toes away from the earth. Find the squeeze and stick to it!
10. Chin Stand (Ganda Bherundasana)

If you love vinyasa yoga, chin stand is a fun transition that can be used to add challenge to your chaturanga dandasana. It requires shoulder strength, spine flexibility, and courage!
How to move into chin stand:
From downward facing dog, lift one leg high behind you. Gaze forward, shift forward into high plank, and start to bend your elbows back. Squeeze your elbows into the sides of your body and gently lower your chin down towards the earth. Micro-bend your bottom knee and gently hop to float your bottom leg up. Hug your legs together.
Tips for chin stand:
It may help to walk your toes in slightly in downward facing dog. The greater lift in your hips will make for a slightly smaller hop.
Press into your palms significantly to activate your chest and triceps. There should be little to no weight in your chin.
Keep your core active to protect your spine in the backbend.
11. Handstand (Adho Mukha Vrksasana)

The handstand is one of the most difficult yoga postures to master - and one of the most sought after. It’s a pose that often takes years of consistency and dedication. With the tips below, you’ll be closer to finding balance on your hands!
How to move into handstand:
Start in a downward facing dog. Lift your heels and start to walk your toes in towards your hands as much as possible. Extend one leg towards the sky, microbend your bottom leg, and take tiny hops to find lift in your bottom leg. Once you feel your hips stack over your shoulders at the point of balance, squeeze your legs together.
Tips to move into handstand:
Keep your arms straight. Bending your elbows will make you feel like you’re going to collapse on yourself.
Prioritize your core strength. By activating your core, you protect your lower back and help to stabilize your pelvis, keeping your spine straight.
Press the earth away with your palms.